ADVERTISEMENT
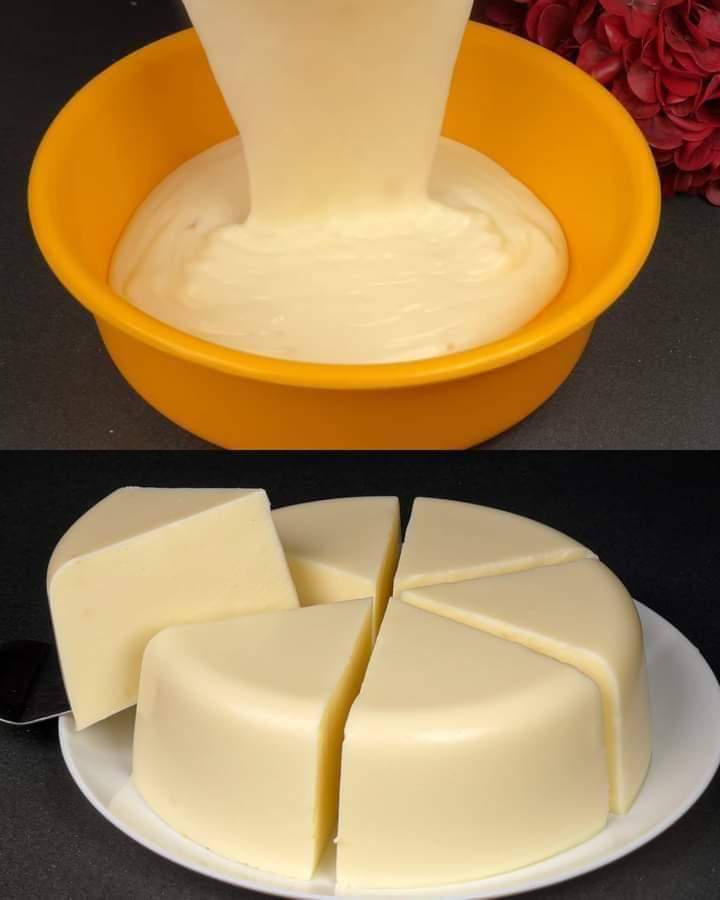
### Homemade Cheese Block: A Simple Guide to Crafting Your Own Cheese at Home
Making **homemade cheese** may sound like a daunting task, but it’s easier than you might think! Whether you’re an avid cheese lover or just looking to experiment in the kitchen, creating your own cheese block can be a fun and rewarding project. With the right ingredients, equipment, and a bit of patience, you can enjoy fresh, flavorful cheese that’s completely customizable to your taste.
In this article, we’ll guide you through the process of making a **Homemade Cheese Block**, which can be used in a variety of dishes or simply enjoyed on its own. Get ready to impress your friends and family with your very own artisanal cheese!
—
### Why Make Homemade Cheese?
There are many reasons why you should consider making your own cheese block at home:
1. **Freshness**: Homemade cheese is fresh, creamy, and free of any artificial additives or preservatives.
2. **Customization**: You have full control over the flavor, texture, and type of cheese. Experiment with herbs, spices, or different milk types to create your ideal cheese.
3. **Cost-Effective**: High-quality cheese can be expensive, especially artisanal varieties. Making it at home allows you to save money while enjoying delicious homemade creations.
4. **Fun and Rewarding**: The process of making cheese is not only educational but also a fun kitchen project. Plus, it’s deeply satisfying to taste the final product.
—
### Ingredients You’ll Need
For this homemade cheese block recipe, we’ll be making a basic **cheddar-style cheese**, but the method can be adapted for a variety of cheeses. Here’s what you’ll need:
– **1 gallon whole milk** (preferably raw or pasteurized, but not ultra-pasteurized)
– **1/4 tablet rennet** (or 1/4 teaspoon liquid rennet)
– **1/4 cup water** (for dissolving the rennet)
– **1/4 cup white vinegar** or **lemon juice** (to help acidify the milk)
– **1/4 cup non-iodized salt** (such as kosher salt or cheese salt)
– **Cheese culture** (optional for specific flavors, like mesophilic or thermophilic cultures)
– **Cheese cloth** (for draining)
– **Large pot** (for heating the milk)
– **Thermometer**
– **Colander** (for draining the curds)
– **Cheese mold** (to shape your cheese block)
—
### Step-by-Step Instructions
#### Step 1: Prepare the Milk
1. **Warm the Milk**: Pour the whole milk into a large pot and place it on the stove. Heat the milk gently over medium heat, stirring occasionally to prevent scorching. Warm it to about **85°F (29°C)**, which is the ideal temperature for adding the culture and rennet.
2. **Add Vinegar**: Once the milk reaches the desired temperature, add the vinegar or lemon juice. This will begin to acidify the milk and help it curdle later. Stir gently to mix.
3. **Add Cheese Culture (Optional)**: If you’re using a cheese culture (which is commonly done for more complex cheeses), sprinkle it over the milk and let it sit for about 5 minutes. Then, stir it in gently to distribute it evenly.
—
#### Step 2: Add Rennet
1. **Dissolve the Rennet**: In a small bowl, dissolve the rennet tablet (or liquid rennet) in 1/4 cup of cool water. Stir the mixture until fully dissolved.
2. **Add the Rennet to the Milk**: Once the rennet is dissolved, slowly pour it into the warm milk while gently stirring in an up-and-down motion. Stir for about 30 seconds to ensure the rennet is well distributed.
3. **Let the Milk Set**: After stirring in the rennet, cover the pot with a clean kitchen towel and let the milk sit undisturbed at **85°F (29°C)** for about 60-90 minutes. During this time, the curds will form, and the milk will become thicker. The result should be a firm curd when you gently touch the surface.
—
#### Step 3: Cut the Curds
1. **Check the Curds**: After the milk has set and curds have formed, check the texture. Gently press the surface of the curds with your finger. If it gives a bit but doesn’t break, you’re ready to cut.
2. **Cut the Curds**: Use a long knife or cheese curd cutter to cut the curds into 1/2-inch cubes. This allows the whey (the liquid portion) to separate from the curds more effectively.
3. **Let the Curds Rest**: Let the curds rest for about 10-15 minutes after cutting to allow them to firm up slightly.
—
#### Step 4: Cook the Curds
1. **Heat the Curds**: Slowly heat the curds to about **110°F (43°C)** by gently raising the temperature over low heat. Stir the curds occasionally, being careful not to break them apart too much. This process helps expel more whey and firm up the curds.
2. **Continue Stirring**: Stir the curds gently for another 30-40 minutes. As the curds cook, they will shrink and firm up, releasing more whey.
For Complete Cooking STEPS Please Head On Over To Next Page Or Open button (>) and don’t forget to SHARE with your Facebook friends
ADVERTISEMENT
