ADVERTISEMENT
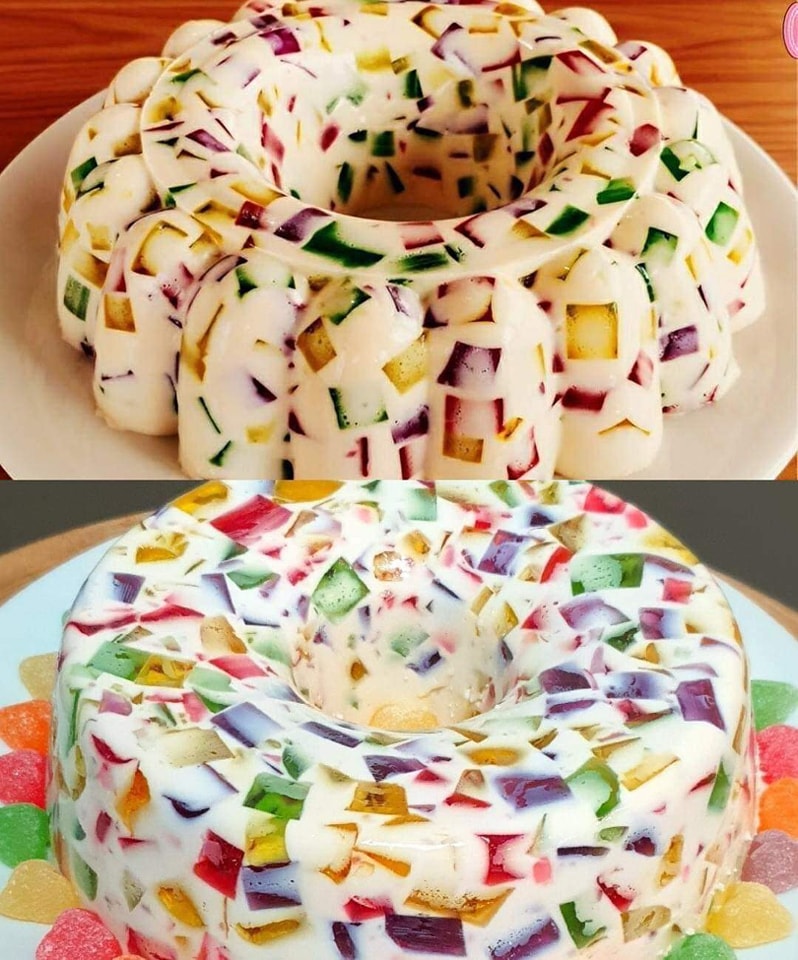
**Beautiful and Delicious Dessert: Colored Gelatine Recipe**
If you’re looking to add a touch of creativity and fun to your dessert table, a **colored gelatine recipe** is the perfect choice! This vibrant and visually stunning dessert is not only easy to make but also a delight for the senses. With its glossy, jewel-like appearance and refreshing taste, colored gelatine (or Jell-O) can be a showstopper at any gathering, from birthday parties to holiday celebrations or casual family dinners.
Made with just a few simple ingredients, this dessert offers endless possibilities for flavor and color combinations, allowing you to customize it to suit any occasion. Whether you’re looking for a fun treat for kids or a chic dessert to impress guests, **colored gelatine** can be made to suit all tastes and preferences.
### Why You’ll Love This Colored Gelatine Recipe:
1. **Visually Stunning**: The striking colors of gelatine layers create an eye-catching dessert that will be the star of the table. Its translucent, vibrant hues add elegance and a playful charm to any gathering.
2. **Customizable**: You can mix and match flavors and colors to create a dessert that reflects your theme, or even make it seasonal by using colors like red and green for Christmas or pastel shades for Easter.
3. **Simple Ingredients**: This dessert requires only a few basic ingredients, making it easy to whip up in a short amount of time. Plus, you don’t need any special equipment to get started.
4. **Fun to Make**: Whether you’re making this for a special event or just as a fun family activity, making colorful layers of gelatine is an enjoyable process. It’s perfect for kids to get involved in, as they can help pick the colors and flavors.
Let’s take a closer look at how to prepare this beautiful and delicious dessert!
### Ingredients:
– **3 packs of flavored gelatin (Jell-O)** – Choose a variety of colors and flavors such as strawberry, lemon, lime, or orange for a colorful effect.
– **1 can (14 oz) sweetened condensed milk** – For a creamy layer that contrasts with the fruit-flavored gelatin.
– **3 cups hot water** – To dissolve the gelatin and create the base for each layer.
– **1 tablespoon unflavored gelatin** – This will help set the creamy layer.
– **1 1/2 cups cold water** – To make the gelatin firm and give it a smooth texture.
– **Optional: Fresh fruits** (like berries, kiwi, or pineapple) – For garnish or adding extra flavor and texture.
### Directions:
**Step 1: Prepare the Gelatin Layers**
1. **Dissolve the Gelatin**: Start by dissolving one packet of your chosen flavored gelatin (e.g., strawberry or orange) in **1 cup of hot water**. Stir well until the gelatin has completely dissolved. Set it aside to cool to room temperature.
2. **Pour the First Layer**: Once the gelatin has cooled slightly, pour it into a shallow glass dish or individual serving cups. Aim for about 1/2 inch to 1-inch thickness for each layer, depending on your desired size. Allow this layer to set in the refrigerator for **30-45 minutes** or until it is firm to the touch.
3. **Repeat with Other Colors**: Repeat the process with the remaining gelatin packets, choosing different colors and flavors. For each layer, dissolve the gelatin in **1 cup of hot water** and let it cool before pouring over the previous layer. Allow each layer to set completely before adding the next one.
**Step 2: Prepare the Creamy Layer**
1. **Bloom the Unflavored Gelatin**: In a small bowl, combine the **unflavored gelatin** with **1/2 cup cold water** and let it sit for about 5 minutes to “bloom” or soften.
2. **Dissolve the Gelatin**: After the unflavored gelatin has bloomed, heat it gently in the microwave or over a stovetop until it has dissolved completely (be careful not to boil).
3. **Mix with Sweetened Condensed Milk**: In a separate bowl, combine the **sweetened condensed milk** with **1 cup of cold water** and stir well. Add the dissolved unflavored gelatin mixture to the milk and water, mixing thoroughly until smooth.
For Complete Cooking STEPS Please Head On Over To Next Page Or Open button (>) and don’t forget to SHARE with your Facebook friends
ADVERTISEMENT
