ADVERTISEMENT
—
### 🥄 How to Make Chocolate Orange Cake
#### Step 1: **Prepare the Cake Pans**
Preheat your oven to **350°F (175°C)** and grease two 8-inch round cake pans (or one 9×13 pan) with butter or cooking spray. You can also line the bottom with parchment paper for easy removal after baking.
#### Step 2: **Mix the Dry Ingredients**
In a large bowl, whisk together the **flour**, **sugar**, **cocoa powder**, **baking powder**, **baking soda**, and **salt**. Make sure everything is well combined.
#### Step 3: **Mix the Wet Ingredients**
In another bowl, beat together the **eggs**, **vegetable oil**, **buttermilk**, **orange juice**, **orange zest**, and **vanilla extract**. Mix until the wet ingredients are fully incorporated.
#### Step 4: **Combine the Wet and Dry Ingredients**
Gradually add the wet ingredients to the dry ingredients, stirring gently until just combined. Be careful not to overmix; a few lumps are okay.
#### Step 5: **Bake the Cake**
Divide the batter evenly between the prepared cake pans. Bake for about **25-30 minutes**, or until a toothpick inserted into the center of the cakes comes out clean. If you’re using a 9×13 pan, it may take a little longer (around 35-40 minutes).
Once the cakes are done, remove them from the oven and allow them to cool in the pans for 10 minutes. Then, transfer the cakes to a wire rack to cool completely.
#### Step 6: **Make the Chocolate Ganache**
While the cakes are cooling, prepare the chocolate ganache. In a small saucepan, heat the **heavy cream** over medium heat until it begins to simmer (not boil). Once hot, remove it from the heat and add the **chopped chocolate**. Let it sit for a minute, then whisk until smooth and glossy. Stir in the **unsalted butter** until fully melted and incorporated.
#### Step 7: **Assemble the Cake**
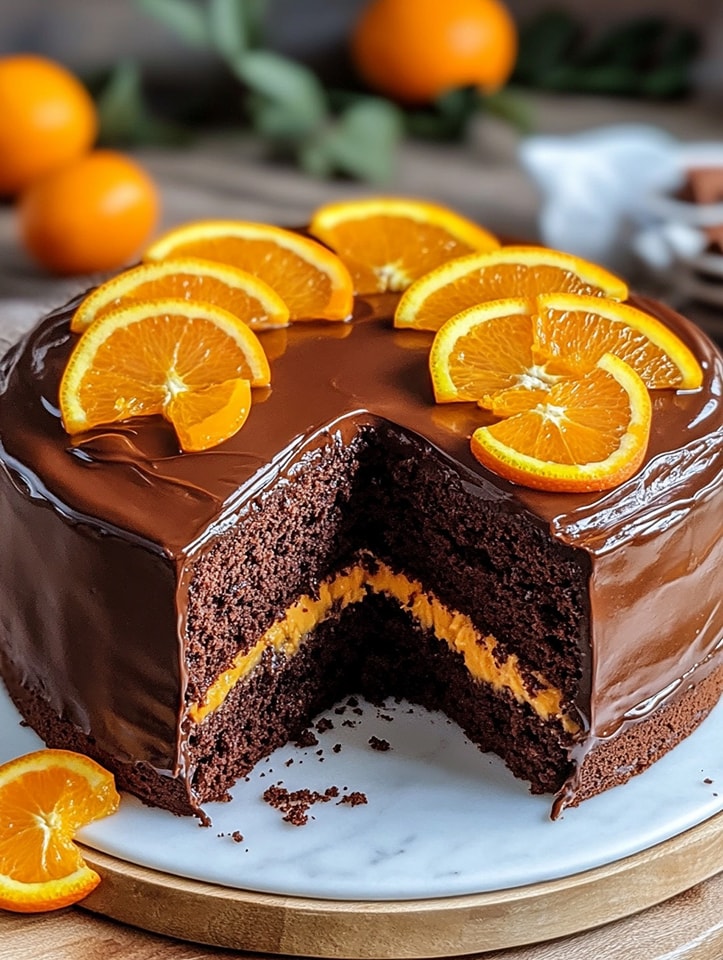
Once the cakes are completely cooled, place one cake layer on a serving plate or cake stand. Spread a layer of ganache on top, then add the second cake layer. Pour the remaining ganache over the top, allowing it to drip down the sides of the cake for a beautiful, elegant finish.
#### Step 8: **Garnish and Serve**
For an extra burst of citrus flavor, garnish the cake with a sprinkle of **orange zest** on top. Serve and enjoy the decadent, flavorful goodness of this **Chocolate Orange Cake**!
—
### 🍴 Tips & Tricks for the Best Chocolate Orange Cake
– **For extra orange flavor**: Try adding a tablespoon of **orange liqueur** (such as Grand Marnier) to the ganache or cake batter for a more intense citrus kick.
– **Don’t skip the buttermilk**: The acidity in buttermilk helps create a soft, tender crumb, making the cake even fluffier. If you don’t have buttermilk, a quick substitute is to add 1 tablespoon of **lemon juice** to 1 cup of milk and let it sit for a few minutes.
– **Make it ahead of time**: This cake stores beautifully and actually gets better as it sits for a day or two, allowing the flavors to meld together. Store it covered in a cool place for up to 3 days, or refrigerate it for up to a week.
– **For a layered cake**: If you prefer, you can use this same recipe to create a four-layer cake by cutting the two layers in half horizontally, or by baking the batter in four separate pans.
—
### 🎉 Final Thoughts
This **Chocolate Orange Cake** is the perfect dessert for anyone who loves the irresistible combination of chocolate and citrus. Its moist, flavorful layers, paired with a glossy chocolate ganache and vibrant orange zest, make it a showstopper for any occasion. Whether you’re celebrating a special event or simply indulging in a little treat, this cake will definitely satisfy your sweet tooth and leave everyone asking for seconds.
So next time you’re in the mood for something decadent and zesty, try baking this easy yet impressive **Chocolate Orange Cake**—it’s sure to become a new favorite in your baking collection! 🍊🍫🎂
ADVERTISEMENT
