ADVERTISEMENT
**Growing Lemon Trees in Cups: A Fresh and Fragrant Indoor Addition 🍋🌿**
Imagine walking into your kitchen and being greeted by the bright, citrusy scent of lemon trees—right from your windowsill. Sounds dreamy, right? Well, the good news is, you don’t need a sprawling backyard or a fancy greenhouse to grow your own lemon tree. With just a **simple cup or small pot**, some patience, and a bit of love, you can grow a thriving **lemon tree indoors**—yes, really!
Whether you’re a gardening newbie or a houseplant pro, growing lemon trees in cups is an **easy, rewarding, and refreshingly fragrant** way to bring a slice of nature indoors. And the best part? It’s a fun project that pays off in beauty, aroma, and eventually—fruit!
Here’s everything you need to know to get started.
—
### 🍋 Why Grow Lemon Trees Indoors?
Lemon trees aren’t just beautiful—they’re also practical! Here’s why people are falling in love with this citrusy indoor trend:
– **Compact and Decorative**: Small lemon plants look lovely in bright kitchens or sunny corners.
– **Air-Purifying**: Like many houseplants, lemon trees help **clean the air** and **boost humidity**.
– **Fresh Fragrance**: Their natural citrus scent is uplifting, refreshing, and calming.
– **Homegrown Lemons**: With the right care, you can eventually harvest your own juicy lemons!
—
### 🪴 What You’ll Need
Growing a lemon tree in a cup or small container is easier than you think. Here’s what you’ll need to get started:
✅ A wide cup, small pot, or container (with drainage holes)
✅ Organic lemon seeds (or seeds from an organic lemon)
✅ Potting soil (well-draining, citrus-friendly mix is ideal)
✅ Water
✅ Plastic wrap or a small plastic bag (for sprouting)
✅ Sunny windowsill or a grow light
✅ A little patience!
—
### 🌱 Step-by-Step: How to Grow a Lemon Tree in a Cup
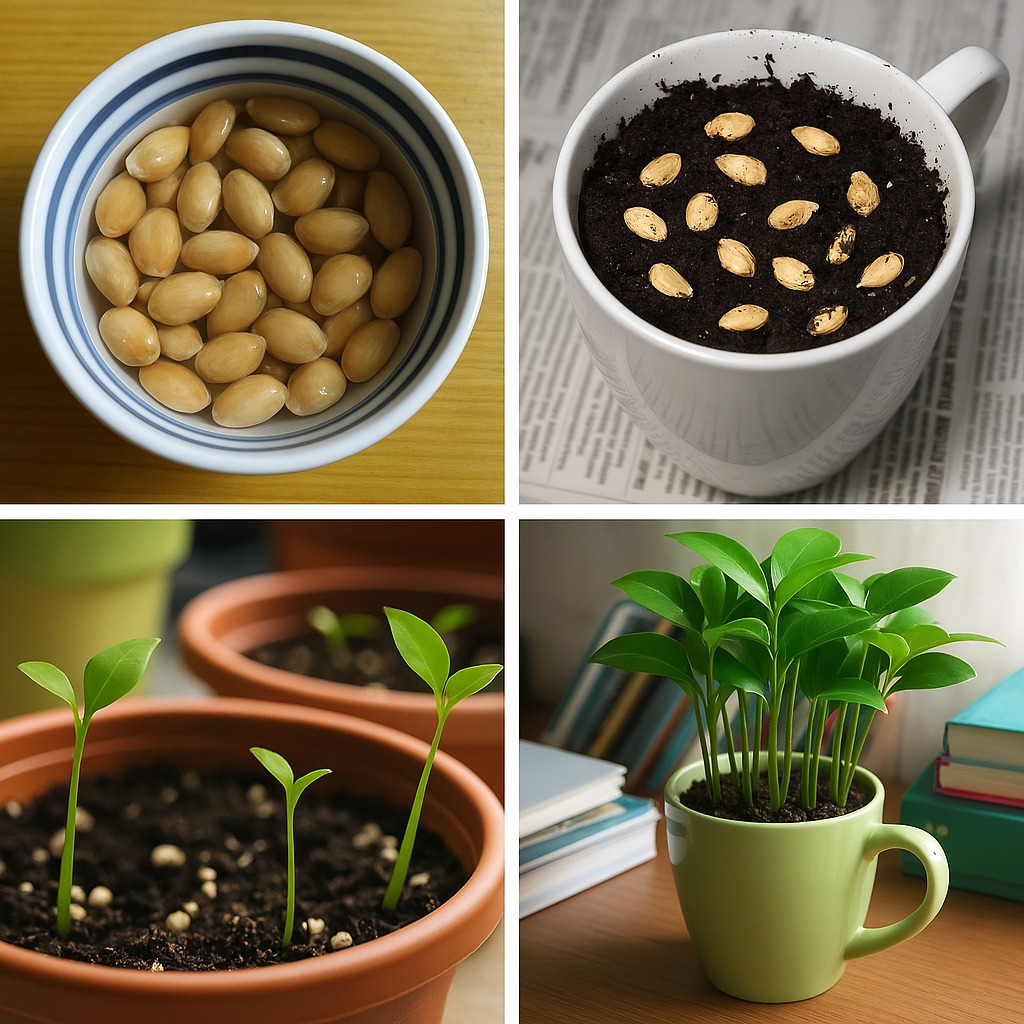
#### 1. **Collect and Prepare the Seeds**
Start with a fresh **organic lemon** (non-organic lemons may have treated seeds that won’t sprout). Cut the lemon and carefully remove the seeds.
– Rinse the seeds gently to remove pulp.
– Soak them in warm water for a few hours.
– Optional: Gently peel off the outer white shell for faster germination.
#### 2. **Plant the Seeds**
Fill your cup or small container with **moist potting soil**. Poke a small hole about ½ inch deep, place the seed inside, and cover lightly with soil.
#### 3. **Create a Mini Greenhouse**
Cover the top of the cup with **plastic wrap** or a small clear bag to create a warm, humid environment. This helps the seed sprout faster.
– Place the container in a **warm, sunny spot** (a windowsill is perfect).
– Mist the soil lightly every couple of days to keep it moist—but not soggy.
4. **Wait for Germination**
Germination can take **1 to 2 weeks**, sometimes longer. Be patient and keep the soil warm and moist. Once you see a little sprout, remove the plastic wrap and move the plant to a spot with **bright, indirect sunlight**.
For Complete Cooking STEPS Please Head On Over To Next Page Or Open button (>) and don’t forget to SHARE with your Facebook friends
ADVERTISEMENT
