ADVERTISEMENT
**Pastel Kisses: A Colorful, Sweet Treat That Melts in Your Mouth!**
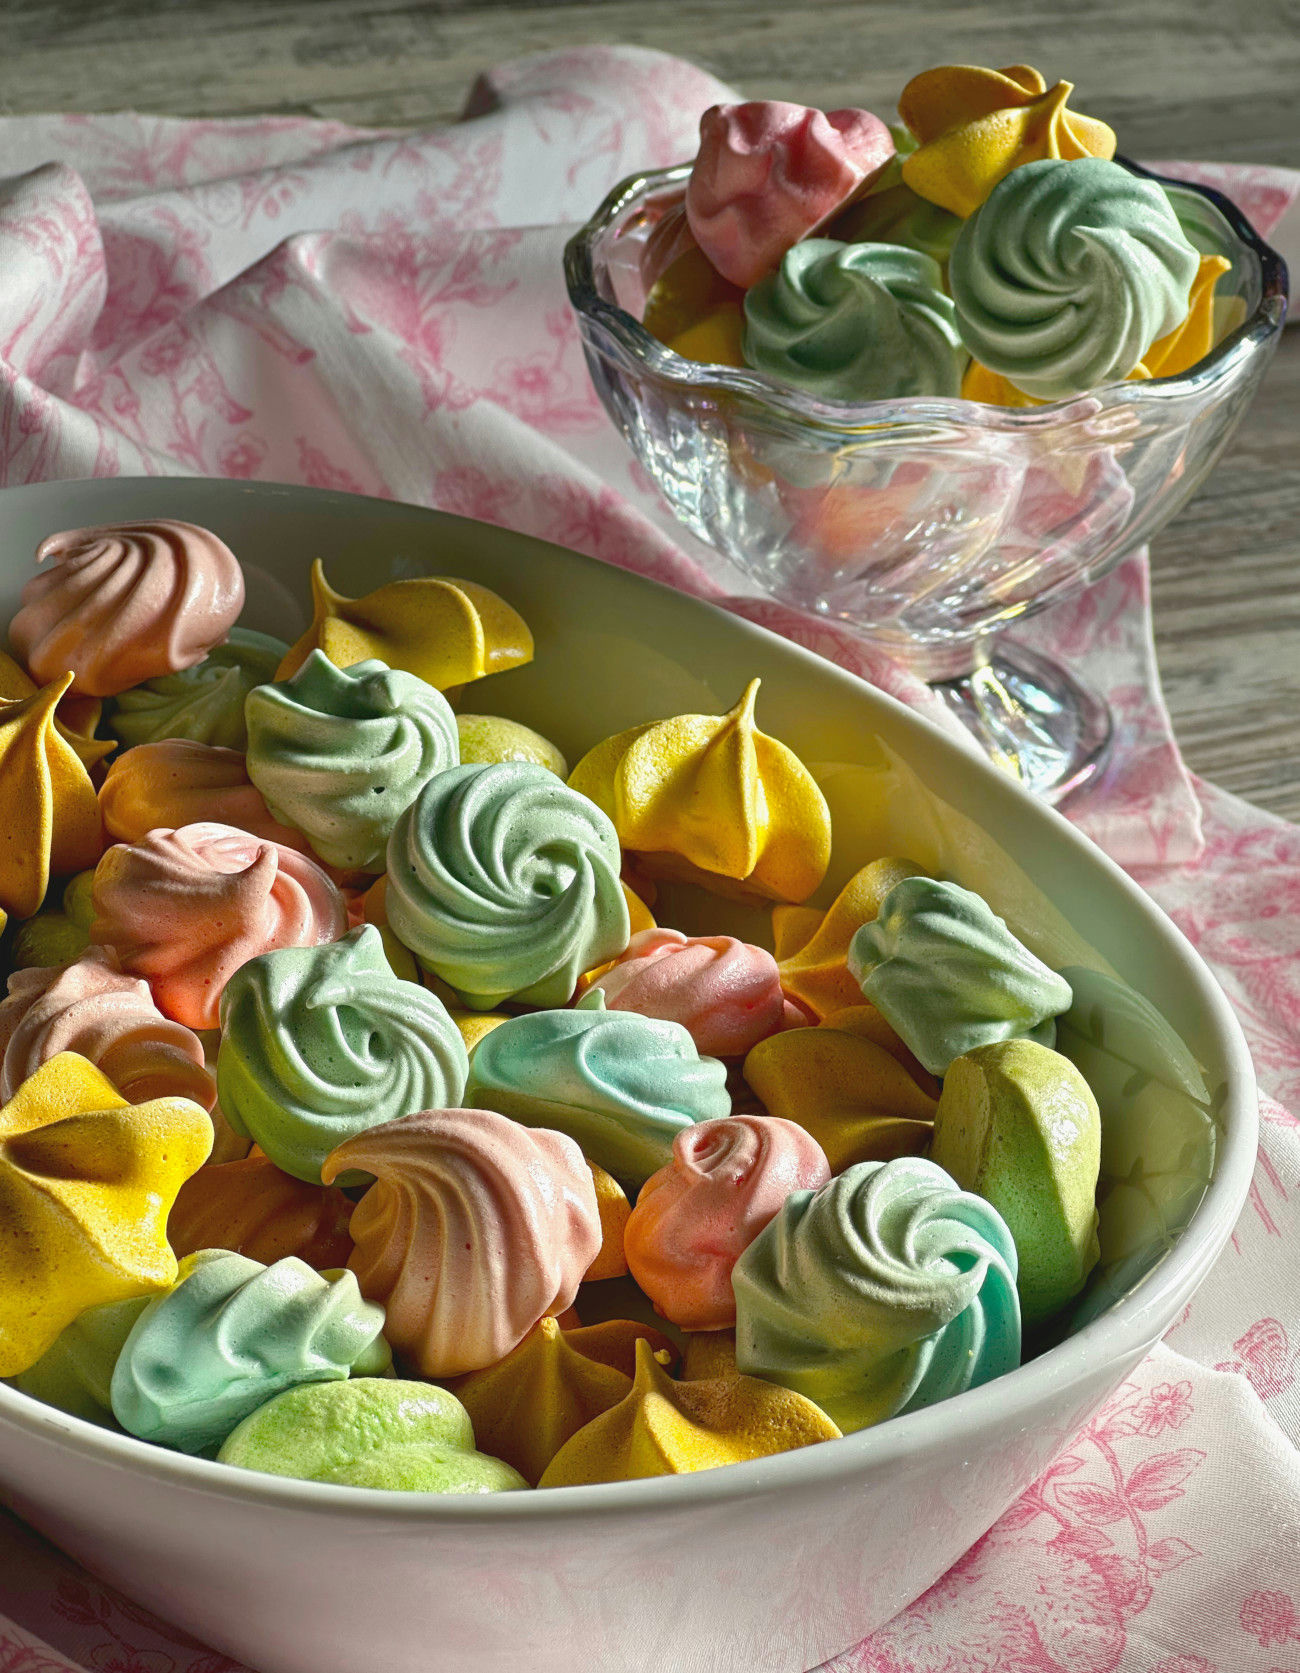
If you’re looking for a fun and delicious treat that will brighten up your day, look no further than **Pastel Kisses**! These light, airy, and colorful meringue cookies are the perfect sweet bite for any occasion. Whether you’re preparing for a special celebration or simply want a treat to enjoy with your afternoon tea, Pastel Kisses are sure to impress with their delicate texture and pastel hues.
Let’s dive into why these beautiful little cookies are so beloved, how they’re made, and what makes them the perfect addition to any dessert table.
### **What Are Pastel Kisses?**
Pastel Kisses are small, delicate meringue-based cookies that are often flavored with vanilla and adorned with soft pastel colors. The key to their charm lies in their texture—they’re light and airy, almost dissolving in your mouth with each bite. These cookies have a slightly crisp outer shell with a melt-in-your-mouth center, making them irresistible to anyone with a sweet tooth.
The pastel colors make them a visually appealing treat, perfect for birthdays, baby showers, Easter, or any occasion where a colorful dessert will bring a smile. They’re also customizable, meaning you can add your favorite colors to match your event’s theme or to simply create an eye-catching array of treats.
### **Why Are They Called “Kisses”?**
The name “Kisses” is inspired by the meringue’s shape and texture. When baked, the cookies form soft, rounded peaks that resemble little kisses, which makes the name even more fitting. These bite-sized meringues are gentle, sweet, and light as air, much like a kiss.
### **The Ingredients You Need for Pastel Kisses**
Making Pastel Kisses is relatively simple, but you’ll need a few basic ingredients to get started. The main ingredients are egg whites, sugar, and vanilla extract, with food coloring added to give them that beautiful pastel hue. Here’s everything you need:
#### **Ingredients:**
– **3 large egg whites** (room temperature)
– **1/2 cup granulated sugar**
– **1/4 teaspoon vanilla extract**
– **1/4 teaspoon cream of tartar** (optional, helps stabilize the meringue)
– **Pinch of salt**
– **Food coloring** (pastel shades of your choice)
– **Parchment paper** (for lining the baking sheet)
### **How to Make Pastel Kisses: A Step-by-Step Guide**
#### **Step 1: Preheat and Prepare the Baking Sheet**
Start by preheating your oven to **225°F (107°C)**. Line a baking sheet with parchment paper to prevent the meringues from sticking.
#### **Step 2: Beat the Egg Whites**
In a large, clean mixing bowl, begin beating your **egg whites** with an electric mixer on medium speed. Add a **pinch of salt** to help stabilize the egg whites. Continue beating until soft peaks form, which should take about **2 minutes**.
#### **Step 3: Add Sugar Gradually**
Once you have soft peaks, begin adding the **granulated sugar**, a tablespoon at a time, while continuing to beat on high speed. This step is crucial because adding the sugar gradually helps the meringue become smooth and glossy. Keep beating until stiff peaks form, meaning the egg whites should hold their shape and stand tall when the beaters are lifted.
#### **Step 4: Add Vanilla and Optional Cream of Tartar**
Once the sugar is fully incorporated, add the **vanilla extract** for flavor. If you’re using **cream of tartar** (optional but helps create a firmer texture), add it now and give the mixture a final beat to combine everything.
#### **Step 5: Color the Meringue**
Now comes the fun part—adding color! Divide the meringue mixture into separate bowls, depending on how many colors you want to use. Add a few drops of **pastel food coloring** to each bowl and gently fold the color into the meringue, taking care not to deflate the mixture. Use soft pastel colors like pink, blue, lavender, or mint for the classic pastel look, but feel free to experiment with different shades to match your theme.
#### **Step 6: Pipe the Meringues**
Using a piping bag fitted with a star or round tip (or even just a Ziploc bag with the tip cut off), carefully pipe small mounds of meringue onto the prepared baking sheet. You can make them as big or small as you like, but smaller meringues work best for these “kisses.” Leave some space between each meringue, as they will expand slightly during baking.
#### **Step 7: Bake Low and Slow**
Place the baking sheet in the preheated oven and bake the meringues for **1 to 1 1/2 hours**. Meringues should be dry to the touch and crisp around the edges. The color may slightly deepen, but they should retain their pastel hues.
**Step 8: Cool and Enjoy**
Once the meringues are done, turn off the oven and let them cool completely inside with the door slightly ajar. This will help prevent them from cracking due to a sudden temperature change. Once cool, gently peel the meringues off the parchment paper and enjoy the crispy, melt-in-your-mouth goodness.
For Complete Cooking STEPS Please Head On Over To Next Page Or Open button (>) and don’t forget to SHARE with your Facebook friends
ADVERTISEMENT
