ADVERTISEMENT
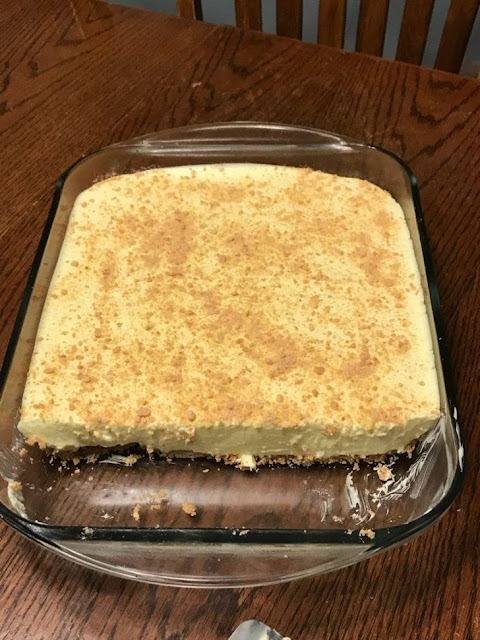
**No-Bake Woolworth Icebox Cheesecake: A Sweet Nostalgic Delight**
If you’re looking for a dessert that’s both nostalgic and effortless, look no further than the **No-Bake Woolworth Icebox Cheesecake**. This creamy, rich, and velvety cheesecake is a throwback to the good old days, where it was a beloved treat in Woolworth’s lunch counters. Whether you’ve tasted it before or are experiencing it for the first time, this classic cheesecake recipe is sure to win over everyone who tries it.
What makes this cheesecake so special? Not only is it incredibly delicious, but it’s also *no-bake*, making it a perfect choice for those who don’t want to spend hours in the kitchen. Let’s dive into why this recipe is a must-try and how you can recreate it in your own home.
### **Why You’ll Love No-Bake Woolworth Icebox Cheesecake**
Before we get to the recipe, let’s talk about why this cheesecake is such a fan favorite:
1. **No Baking Required**: As the name suggests, this cheesecake doesn’t need to go in the oven. With just a few ingredients and some fridge time, you’ll have a perfectly set, smooth, and creamy cheesecake ready to serve.
2. **Simple Ingredients**: It’s made with pantry staples that you probably already have on hand. No need for complicated techniques or rare ingredients—just cream cheese, sugar, and graham crackers, among a few others.
3. **Classic Flavor**: The combination of the creamy filling and sweet graham cracker crust gives you the perfect balance of flavors. Plus, the cool and chilled texture makes it a refreshing dessert for warm days or whenever you want something light yet indulgent.
4. **Customizable Toppings**: One of the best parts about this cheesecake is that you can top it with whatever you like—fresh berries, chocolate syrup, whipped cream, or even a caramel drizzle. The possibilities are endless!
### **Ingredients for No-Bake Woolworth Icebox Cheesecake**
This recipe makes a delightful cheesecake that serves 8 to 10 people. Here’s what you’ll need:
#### **For the Crust:**
– 1 ½ cups graham cracker crumbs (about 10-12 full graham crackers)
– ⅓ cup granulated sugar
– ⅓ cup unsalted butter, melted
#### **For the Filling:**
– 2 (8-ounce) packages of cream cheese, softened
– 1 cup powdered sugar
– 1 teaspoon vanilla extract
– 1 cup heavy cream (cold)
– ½ cup sour cream
#### **For the Topping:**
– Fresh berries (optional, for garnish)
– Whipped cream (optional, for garnish)
– Fruit preserves or fruit compote (optional)
### **Instructions for No-Bake Woolworth Icebox Cheesecake**
#### **1. Prepare the Crust**
Start by making the graham cracker crust. In a medium bowl, combine the **graham cracker crumbs** and **granulated sugar**. Stir them together until well mixed. Then, pour in the **melted butter** and stir until the crumbs are evenly coated and the mixture sticks together when pressed.
Next, press the graham cracker mixture into the bottom of a **9-inch springform pan** or pie dish. Use the back of a spoon to gently press the crumbs into an even layer along the bottom of the pan. If you prefer a thicker crust, you can also press the mixture up the sides of the pan.
Once your crust is ready, place the pan in the fridge to chill while you prepare the filling. This will help the crust set and hold together better once the cheesecake filling is added.
#### **2. Make the Filling**
In a large mixing bowl, beat the softened **cream cheese** with a hand mixer or stand mixer until it’s smooth and creamy. Add the **powdered sugar** and **vanilla extract**, and beat again until everything is well combined.
Next, in a separate bowl, whip the **heavy cream** until stiff peaks form. This step adds air to the cream, giving the cheesecake filling a light and airy texture.
Once the whipped cream is ready, gently fold it into the cream cheese mixture. Be sure to fold carefully to maintain the fluffiness of the whipped cream. Add in the **sour cream** and fold until fully combined. The mixture should be smooth, creamy, and thick.
For Complete Cooking STEPS Please Head On Over To Next Page Or Open button (>) and don’t forget to SHARE with your Facebook friends
ADVERTISEMENT
