ADVERTISEMENT
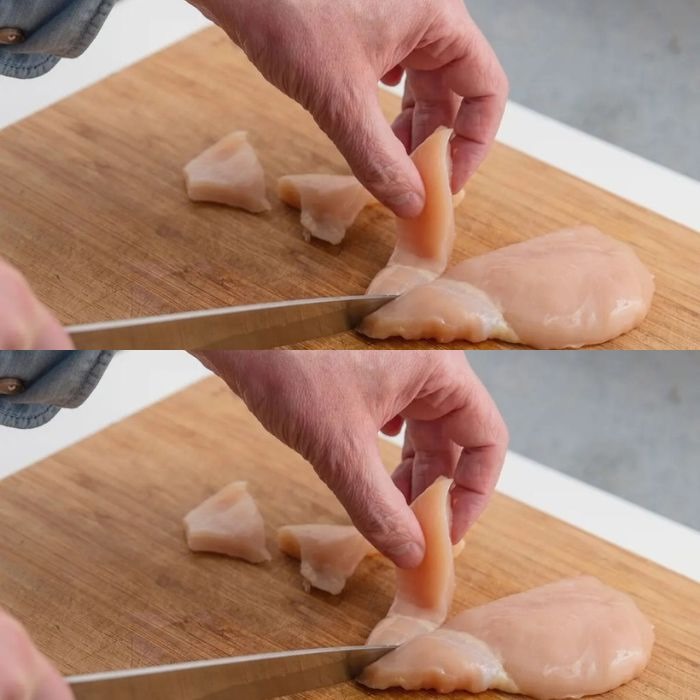
#### **Step 6: Clean and Trim the Meat**
After removing the tendons, trim any excess fat or unwanted tissue from the chicken breast. You should now be left with a smooth, tender piece of meat ready for cooking.
### **Tips for Success**
– **Use a sharp knife**: A sharp knife will make the process easier and safer. It will also allow for more precise cuts, ensuring that you only remove the tendons and not too much of the surrounding meat.
– **Work carefully**: Tendons can sometimes be tricky to remove completely, especially if they’re deeply embedded in the muscle. Go slowly, and be careful not to cut into the breast too much.
– **Practice makes perfect**: The more you remove tendons from chicken breasts, the better you’ll get at it. Don’t be discouraged if it takes a little practice.
– **Cold chicken is easier to work with**: If your chicken has been stored in the fridge, it will be firmer and easier to handle. If it’s been left out at room temperature for a while, consider chilling it briefly before cutting.
### **Why Should You Remove the White Tendons?**
Removing the white tendons from chicken breasts offers several benefits:
– **Improved Texture**: Tendons are tough and rubbery, and chewing through them can be unpleasant. By removing them, you ensure that the chicken is tender and easy to eat.
– **Better Presentation**: Chicken breasts without sinew look cleaner and more polished, making your dish look more professional.
– **Better Cooking**: Removing tendons allows the chicken to cook more evenly. Tendons do not break down as easily as meat during cooking, which can lead to uneven texture and tough spots.
– **Enhanced Flavor**: When you remove the sinew, you are left with just the chicken meat, which will absorb marinades and seasonings better. This ensures a juicier and more flavorful result.
### **Alternative Methods**
If you prefer not to remove the tendons manually, there are a few alternatives:
– **Pre-cut, Tenderized Chicken**: Some stores offer pre-tenderized chicken breasts that may have the tendons removed for you. While this saves time, it’s also generally more expensive.
– **Tenderizing with a Meat Mallet**: If you don’t mind a little more texture, you can also tenderize the chicken by pounding it with a meat mallet. This method doesn’t remove the tendons, but it helps break down the fibers of the chicken to make it softer and more tender overall.
– **Slow Cooking**: If you’re cooking the chicken in a slow cooker, the tendons will break down over time, making them less noticeable, but this approach is slower and may not provide the same clean, tender meat that removing them manually does.
### **Final Thoughts**
Removing white tendons from chicken breast might seem like an extra step, but it’s worth the effort. By following these simple steps, you can ensure that your chicken breast is not only tender and delicious but also visually appealing. Whether you’re making a chicken stir-fry, grilled chicken, or a baked dish, the absence of tendons will elevate your meal.
With a sharp knife and a little patience, you can master the art of tendon removal, making every chicken dish you create even more enjoyable. Try it next time you’re preparing chicken, and you’ll notice the difference in both texture and taste!
ADVERTISEMENT
