ADVERTISEMENT
### **Instructions**
#### **Step 1: Prepare the Crust**
1. **Preheat the oven**: Start by preheating your oven to 350°F (175°C) and greasing a 9×13-inch baking dish or lining it with parchment paper for easy removal.
2. **Mix the dry ingredients**: In a large mixing bowl, combine the flour, sugar, cinnamon, and salt. Stir them together to evenly distribute the dry ingredients.
3. **Cut in the butter**: Add the cold, cubed butter to the dry mixture. Use a pastry cutter, fork, or your hands to work the butter into the flour mixture until it resembles coarse crumbs. The butter should still be in small, pea-sized pieces.
4. **Add the egg and vanilla**: Add the beaten egg and vanilla extract, and mix until the dough starts to come together. If the dough is too dry, add a tablespoon of ice water at a time until it forms a smooth dough.
5. **Press into the pan**: Press about two-thirds of the dough evenly into the bottom of your prepared baking dish to form the base layer. Use your fingers or the back of a spoon to press it firmly. Set aside the remaining dough for the topping.
#### **Step 2: Prepare the Apple Filling**
1. **Toss the apples**: In a separate bowl, combine the sliced apples, granulated sugar, brown sugar, cinnamon, nutmeg, and lemon juice. Toss the ingredients together until the apples are well-coated.
2. **Thicken the filling**: Add cornstarch to the apple mixture and stir well to combine. This will help thicken the juices released by the apples while baking, ensuring a nice consistency for your filling.
#### **Step 3: Assemble the Bars**
1. **Layer the apples**: Spread the apple filling evenly over the crust layer in your baking dish, making sure the apples are spread out in a single layer.
2. **Add the topping**: Crumble the remaining dough over the apple filling, covering it as evenly as possible. It’s okay if some areas are a bit more exposed than others—this will create a rustic, homemade look.
3. **Sprinkle sugar**: Sprinkle the top with the remaining sugar to create a lovely sweet, crisp topping as it bakes.
#### **Step 4: Bake the Bars**
1. **Bake**: Place the baking dish in the preheated oven and bake for 45-50 minutes, or until the crust is golden brown, and the apples are tender and bubbly. Keep an eye on the bars to ensure the top doesn’t brown too quickly—if it does, you can cover it loosely with foil for the last 10 minutes of baking.
2. **Optional finishing touch**: If you want an extra golden, buttery finish, melt a tablespoon of butter and brush it over the top of the bars during the last 10 minutes of baking.
#### **Step 5: Cool and Serve**
1. **Cool before slicing**: Once the bars are done baking, remove them from the oven and allow them to cool completely in the baking dish. This will help them set and make them easier to slice into neat squares.
2. **Slice and serve**: Once cooled, cut the bars into squares and serve as-is, or add a scoop of vanilla ice cream or a dollop of whipped cream on top for extra indulgence.
### **Why This Recipe Works**
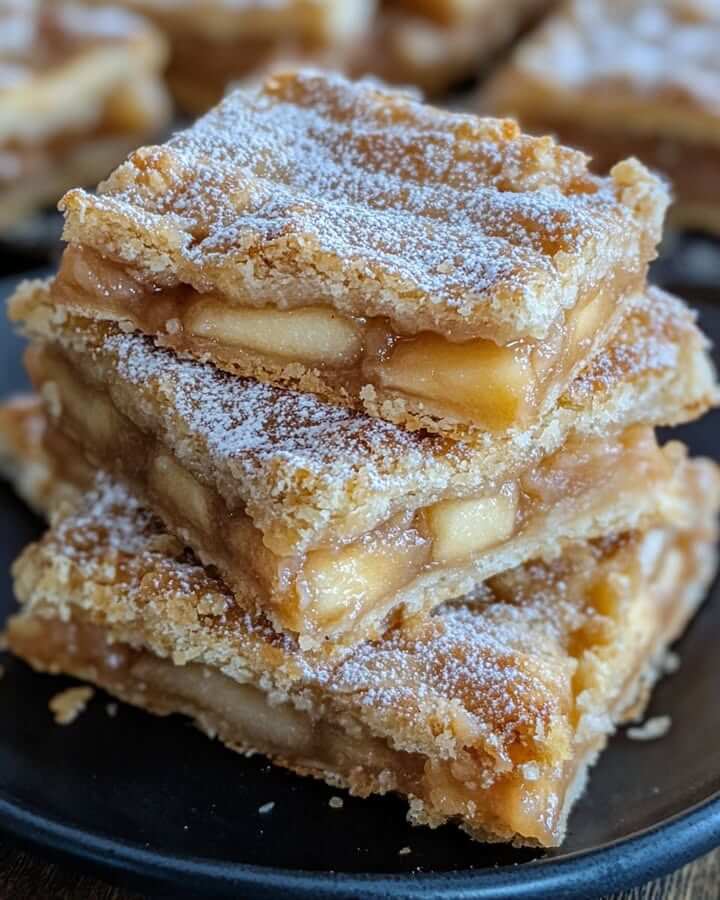
These **Flaky Apple Pie Bars** strike the perfect balance between the rich, buttery crust and the sweet, spiced apple filling. The dough is easy to work with and doesn’t require any complicated pie crust techniques, which makes this dessert a great option for those who want the flavor of apple pie without the fuss. The apples stay tender and perfectly spiced while baking, and the cornstarch ensures the filling thickens into a beautiful, syrupy consistency that coats the apples without being runny.
With just the right amount of sweetness and spice, these bars are the ideal fall treat or a year-round dessert that can be enjoyed by all ages.
### **Tips for the Best Apple Pie Bars**
– **Choose the right apples**: Granny Smith apples give a tart balance to the sweetness of the filling, while Honeycrisp apples offer a sweeter, juicier texture. A mix of both works wonderfully.
– **Adjust the sweetness**: If you prefer your apple filling sweeter, increase the sugar by a tablespoon or two. Alternatively, use less sugar for a more tart flavor.
– **Make it a crustless version**: If you want a lighter option, you can skip the bottom crust entirely and bake the apples directly in the pan with just the crumbly topping. It’s an easy way to simplify the recipe without losing any of the flavor.
– **Make it ahead of time**: These bars can be made ahead and stored in an airtight container at room temperature for up to 3 days. They also freeze well—just wrap them tightly and freeze for up to 2 months. Thaw at room temperature when ready to serve.
### **Serving Suggestions**
These **Flaky Apple Pie Bars** are delicious on their own, but they can be enhanced with a few simple additions:
– **Vanilla Ice Cream**: A scoop of vanilla ice cream is the perfect creamy counterpart to the warm, spiced bars.
– **Whipped Cream**: A dollop of freshly whipped cream adds a light and airy texture that pairs beautifully with the rich apple filling.
– **Caramel Sauce**: Drizzle warm caramel sauce over the top of the bars for an extra layer of indulgence.
### **Final Thoughts**
These **Flaky Apple Pie Bars** bring all the flavors of a classic apple pie into a simpler, more portable form. With their easy-to-make crust, flavorful apple filling, and crumbly topping, they’re the perfect dessert for any occasion. Whether you’re looking for a dessert to impress guests at a party or simply want to treat yourself to something sweet, these bars are sure to satisfy your cravings for something comforting and delicious.
ADVERTISEMENT
