ADVERTISEMENT
#### Instructions:
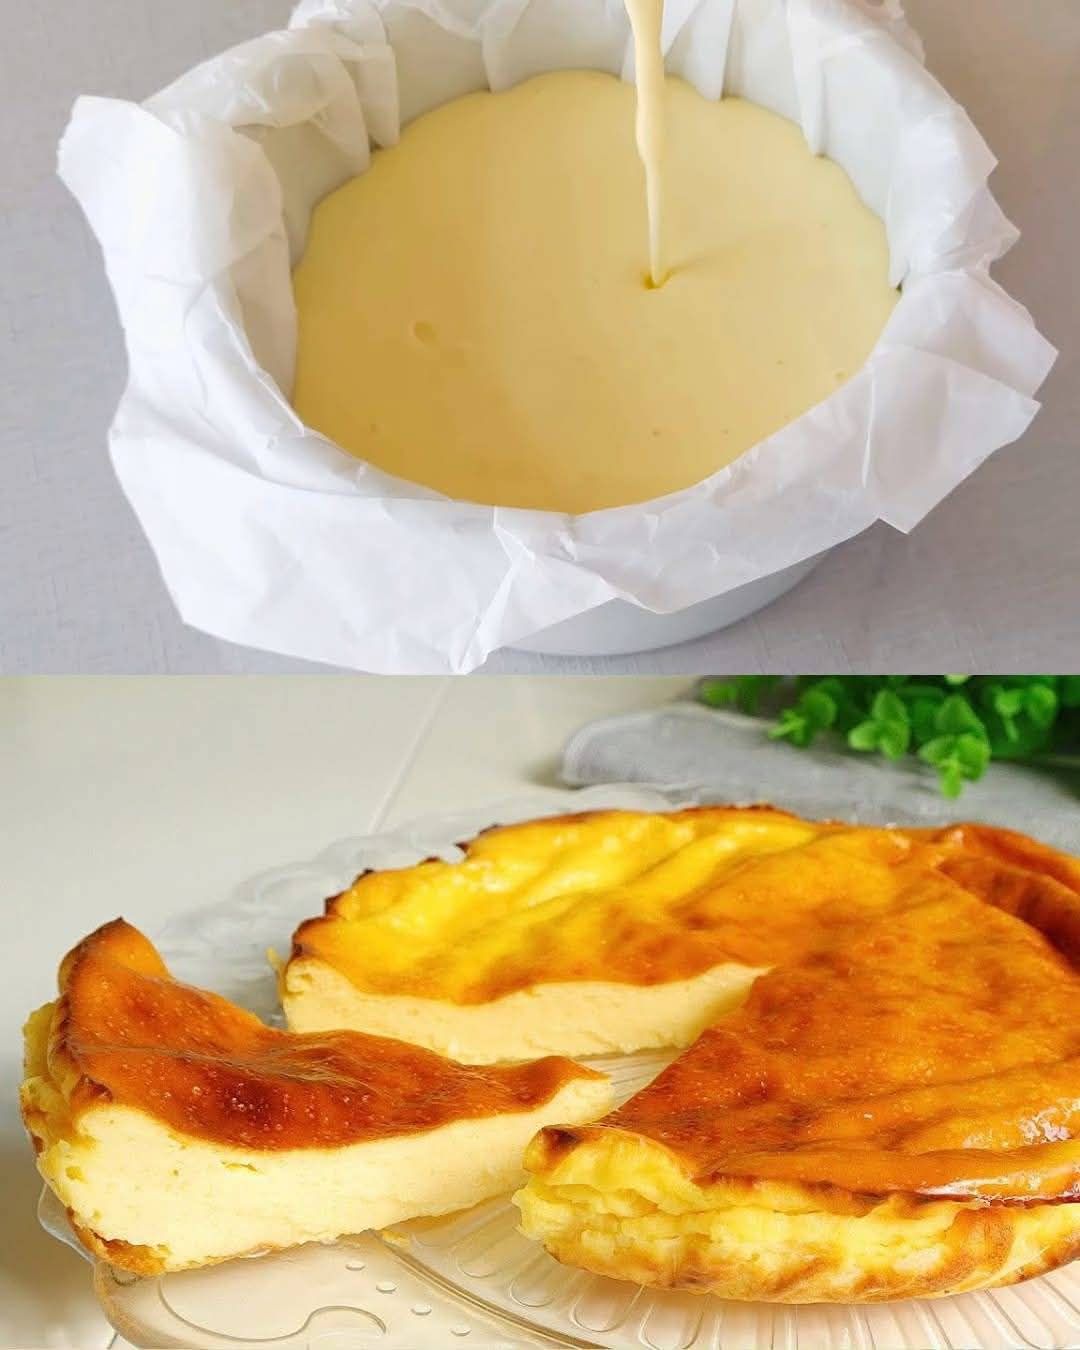
1. **Preheat Your Oven**: Preheat your oven to 400°F (200°C). Line a 10-inch (25cm) round springform pan with parchment paper, making sure the paper comes up the sides of the pan. Don’t worry if the paper sticks out above the top of the pan—it’s part of the rustic look!
2. **Mix the Cream Cheese and Sugar**: In a large mixing bowl, beat the cream cheese and granulated sugar together until smooth and creamy. Use an electric mixer on medium speed for about 3-4 minutes until the mixture is light and fluffy.
3. **Add the Dry Ingredients**: Add the flour and salt to the cream cheese mixture and mix until just combined. Make sure to scrape down the sides of the bowl to ensure everything is fully incorporated.
4. **Incorporate the Eggs**: Add the eggs one at a time, mixing well after each addition. Once all the eggs are added, stir in the vanilla extract.
5. **Add the Heavy Cream**: Gradually pour in the heavy cream and mix until smooth. The batter should be silky and thick, but still pourable.
6. **Bake the Cheesecake**: Pour the batter into the prepared pan and spread it evenly. Bake in the preheated oven for 50-60 minutes, or until the top is deeply golden-brown (almost burnt) and the edges are set but the center is still jiggly. The cheesecake will continue to set as it cools.
7. **Cool and Set**: Allow the cheesecake to cool in the pan for about 1 hour at room temperature. Once cooled, refrigerate it for at least 4 hours, or preferably overnight, to allow the flavors to fully develop and the texture to firm up.
8. **Serve and Enjoy**: Once chilled, remove the cheesecake from the springform pan. The top should be beautifully caramelized, with cracks around the edges. Slice and serve! This cheesecake is perfect on its own, or you can serve it with fresh berries or a dusting of powdered sugar if you want to add a little extra flair.
### Tips for Perfect Burnt Basque Cheesecake
– **Room Temperature Ingredients**: Be sure to use cream cheese and eggs at room temperature. This helps create a smooth batter with no lumps.
– **Don’t Overmix**: When mixing the batter, be careful not to overmix, especially once the eggs are added. Overmixing can cause the cheesecake to crack while baking.
– **Baking Time**: The high heat gives the cheesecake its distinctive look. Keep an eye on it to ensure the top is deeply golden but not burned to a crisp. The center should still be jiggly when you remove it from the oven.
– **Chill Thoroughly**: Let the cheesecake cool at room temperature, then refrigerate for several hours or overnight to achieve the ideal creamy, firm texture.
– **Paper Matters**: Don’t skimp on the parchment paper! It helps keep the cheesecake intact, especially when serving, and contributes to the rustic presentation.
### Why You’ll Love Burnt Basque Cheesecake
The **Burnt Basque Cheesecake** is not only a treat for the taste buds, but it also offers a unique twist on the classic cheesecake that’s both indulgent and visually appealing. The combination of a caramelized, slightly crisp top with a creamy, melt-in-your-mouth center makes each bite a perfect balance of textures and flavors.
The simplicity of the recipe means you don’t need to be a professional baker to create this stunning dessert. Plus, its rustic, imperfect appearance gives it an irresistible charm that makes it both approachable and impressive to serve at gatherings.
### Final Thoughts: A Dessert Worth Trying
The **Burnt Basque Cheesecake** is a true game-changer in the world of desserts. With its bold flavors, creamy texture, and rustic appearance, it’s a must-try for any cheesecake lover. Whether you’re new to this unique dessert or a seasoned fan, it’s sure to become a staple in your baking repertoire.
So, grab your ingredients, fire up your oven, and try making your own **Burnt Basque Cheesecake** today. With just a few simple steps, you’ll be indulging in this creamy, caramelized delight that’s bound to impress and satisfy every time.
ADVERTISEMENT
