ADVERTISEMENT
### Instructions
#### 1. **Preheat the Oven**: Begin by preheating your oven to **350°F (175°C)**. Line an 8×8-inch baking pan with parchment paper or lightly grease it to ensure the squares come out easily after baking.
#### 2. **Prepare the Crust**: In a medium-sized bowl, combine the **graham cracker crumbs**, **sugar**, **melted butter**, and **vanilla extract**. Stir until everything is well incorporated and the crumbs are evenly coated with butter. Press the mixture into the bottom of the prepared baking pan, creating an even layer. Bake the crust for **8-10 minutes** or until lightly golden. Once done, remove from the oven and set aside to cool slightly.
#### 3. **Make the Cheesecake Filling**: While the crust is cooling, prepare the cheesecake filling. In a mixing bowl, beat the **cream cheese** until smooth. Add the **sour cream**, **sugar**, and **vanilla extract**. Beat again until fully combined and creamy. Add the **egg** and **flour**, mixing until everything is well incorporated. Pour the cheesecake batter over the cooled graham cracker crust, smoothing it out with a spatula.
#### 4. **Bake the Cheesecake**: Bake the cheesecake for about **20-25 minutes** or until the edges are set and the center is slightly jiggly. Allow it to cool completely in the pan on a wire rack.
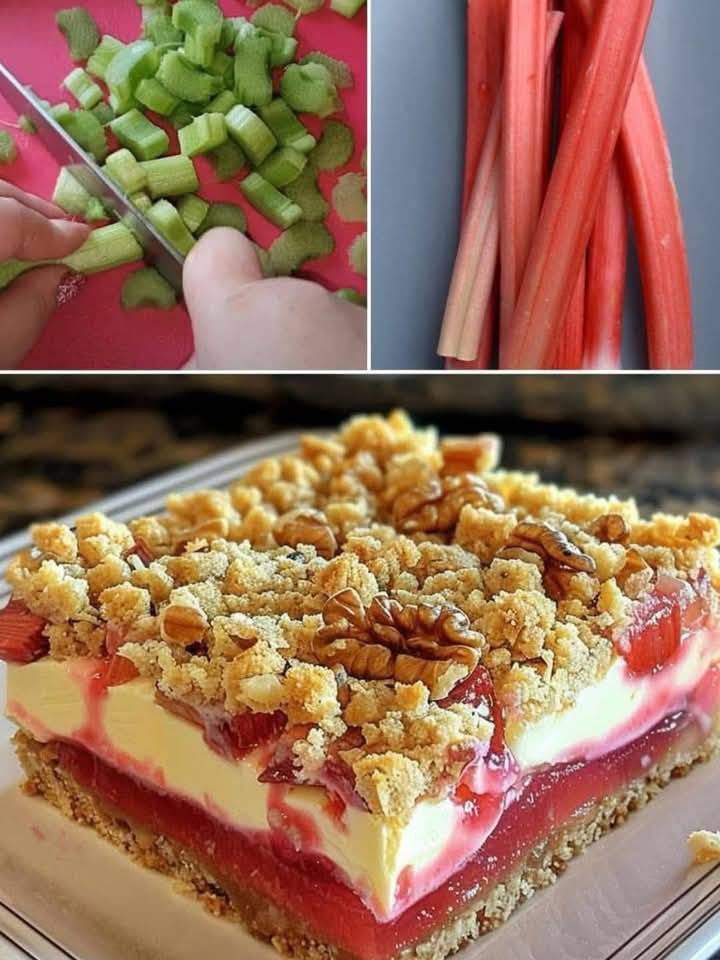
#### 5. **Make the Rhubarb Topping**: While the cheesecake is cooling, prepare the rhubarb topping. In a small saucepan, combine the **rhubarb**, **sugar**, **cornstarch**, and **water**. Stir well to combine. Cook the mixture over medium heat, stirring occasionally, until the rhubarb breaks down and the sauce thickens, about **10-12 minutes**. Remove from heat and stir in the **vanilla extract**. Let the rhubarb sauce cool to room temperature.
#### 6. **Assemble the Squares**: Once the cheesecake has cooled completely, pour the **rhubarb topping** over the cheesecake layer, spreading it out evenly. Refrigerate the assembled cheesecake for at least **4 hours** or overnight to allow it to fully set.
#### 7. **Cut and Serve**: When you’re ready to serve, slice the rhubarb cheesecake into squares. Use a sharp knife to ensure clean cuts, and wipe the knife between each slice for the best results. These squares are best enjoyed chilled and will keep for up to 3 days in the fridge.
### Tips for Perfect Rhubarb Cheesecake Squares
– **Use Fresh Rhubarb**: Fresh rhubarb will give you the best flavor and texture. However, if fresh rhubarb is out of season, you can use frozen rhubarb. Just be sure to thaw and drain any excess moisture before cooking.
– **Adjust the Sweetness**: Rhubarb can vary in tartness, so feel free to adjust the amount of sugar in the rhubarb topping to suit your taste. If you prefer a sweeter filling, you can also increase the sugar in the cheesecake layer slightly.
– **For a More Tart Flavor**: If you love the tartness of rhubarb, you can make the topping even tangier by reducing the sugar slightly and adding a splash of lemon juice.
– **Check for Set Cheesecake**: Make sure your cheesecake is fully set before adding the rhubarb topping. The cheesecake should be firm to the touch around the edges but still slightly soft in the center.
– **Make Ahead**: These cheesecake squares can be made ahead and stored in the fridge. They taste even better after sitting for a day as the flavors meld together.
### Why You’ll Love These Rhubarb Cheesecake Squares
Rhubarb cheesecake squares combine the best of both worlds—the tangy, vibrant flavor of rhubarb paired with the rich, creamy texture of cheesecake. The **graham cracker crust** adds a satisfying crunch, while the **rhubarb topping** provides a burst of flavor that cuts through the creaminess of the cheesecake. This dessert is an excellent way to celebrate the arrival of spring and summer, and it’s guaranteed to be a hit at any gathering or dinner party.
Whether you’re a seasoned rhubarb fan or trying it for the first time, these **rhubarb cheesecake squares** are sure to become a favorite. They’re easy to make, beautifully layered, and offer a delightful balance of sweet and tart. Give this recipe a try, and watch it become your go-to dessert for any occasion!
ADVERTISEMENT
