ADVERTISEMENT
### Instructions: How to Make Frozen Fruit Salad
**Step 1: Prepare the Fruit**
Begin by prepping all of your fruit. Drain the crushed pineapple well to avoid excess moisture in the salad. Slice the strawberries, halve the grapes, and slice the banana. If you’re using fresh fruit, try to use fruit that isn’t too ripe to prevent it from becoming mushy once frozen. You can also add any additional fruits of your choice—kiwi, blueberries, or peaches are great options!
If you prefer, you can also toss in mini marshmallows and chopped nuts for added texture and flavor.
**Step 2: Make the Creamy Dressing**
In a large mixing bowl, combine the softened cream cheese, sour cream (or Greek yogurt), sweetened condensed milk, and vanilla extract. Use a hand mixer or a whisk to blend everything together until smooth and creamy. Taste the mixture and add a bit of honey or powdered sugar if you’d like more sweetness.
**Step 3: Combine the Fruit and Dressing**
Once the creamy mixture is smooth, gently fold the prepared fruit into the mixture. Be careful not to mash the fruit as you stir. You want to keep the fruit intact to maintain its shape and texture.
**Step 4: Freeze the Salad**
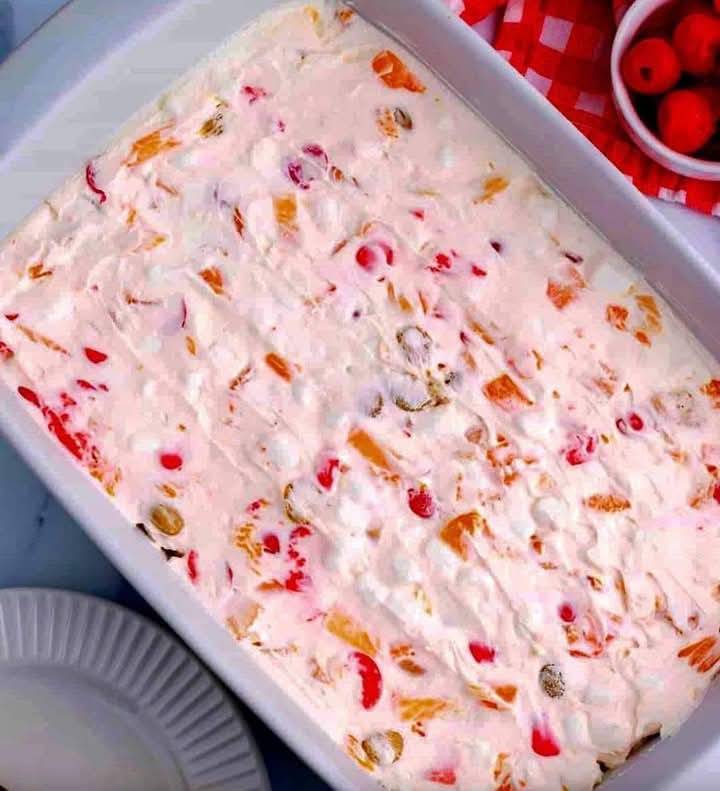
Transfer the fruit salad mixture into a 9×9-inch baking dish, pie pan, or a large bowl. Smooth the top with a spatula to create an even surface. Cover the dish with plastic wrap or foil, and place it in the freezer for at least 4-6 hours, or overnight. The longer it freezes, the firmer and more frozen the salad will be.
**Step 5: Serve and Enjoy**
Once the frozen fruit salad has set, remove it from the freezer and let it sit for a few minutes to soften slightly before serving. This will make it easier to scoop and serve. If desired, garnish with extra fruit or fresh mint leaves to add a pop of color and freshness.
### Tips for Making the Best Frozen Fruit Salad
1. **Drain the Fruit Well**: It’s important to drain the canned pineapple well to avoid excess liquid that can make the salad too runny when frozen.
2. **Use Your Favorite Fruits**: This recipe is highly customizable! You can swap out fruits based on what’s in season or what you have available. Try adding mango, peaches, or even a handful of coconut flakes for a tropical twist.
3. **Add Texture**: Mini marshmallows and chopped nuts add texture and make this salad even more fun to eat. The marshmallows give a chewy texture, while the nuts add a satisfying crunch.
4. **Make Ahead**: Frozen fruit salad is perfect for making ahead. It keeps well in the freezer for up to a week, so you can prepare it the day before a party or gathering. Just be sure to let it thaw slightly before serving.
5. **Make It Lighter**: If you’re looking to lighten the recipe, consider using fat-free cream cheese and Greek yogurt instead of sour cream. You can also reduce the amount of sweetened condensed milk or replace it with a sugar-free alternative.
### Why You’ll Love Frozen Fruit Salad
– **Refreshing and Sweet**: The frozen fruit salad is sweet without being overwhelmingly sugary. The mix of creamy dressing and cool, frozen fruit makes it the ultimate refreshing dessert.
– **Great for Parties**: It’s easy to make in large batches, making it perfect for potlucks, holiday parties, and barbecues. Everyone will be impressed by the beautiful presentation and the delicious, cooling bite.
– **Perfect for All Seasons**: Whether it’s the peak of summer or a cold winter day, this dessert hits the spot. It’s especially refreshing on hot days, but it can be enjoyed year-round.
### Final Thoughts
Frozen fruit salad is one of those classic desserts that’s always a crowd-pleaser. It’s easy to make, versatile, and so incredibly refreshing. With its combination of sweet, creamy, and tangy flavors, this dessert is perfect for any occasion. Whether you’re serving it at a family gathering, a festive celebration, or simply enjoying it as a treat, you’ll find yourself coming back to this recipe time and time again.
So, grab your favorite fruits, whip up this simple creamy dressing, and let your freezer work its magic. Your taste buds will thank you for it! Enjoy!
ADVERTISEMENT
