ADVERTISEMENT
**Amish White Bread Recipe: A Timeless Classic for Your Kitchen**
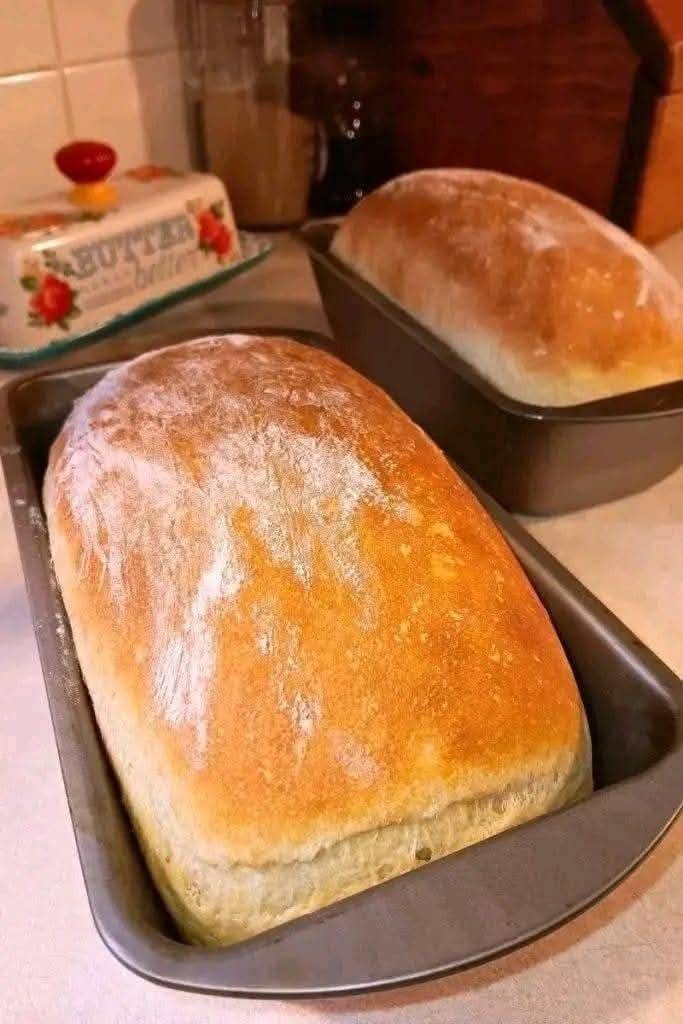
There’s something incredibly comforting about a freshly baked loaf of bread. The aroma that fills your kitchen, the soft, pillowy texture, and that warm, buttery slice with a touch of jam – it’s hard to resist. Among the many traditional bread recipes, **Amish White Bread** stands out as a timeless favorite. Known for its simple ingredients and rustic charm, this bread is the epitome of comfort food. Whether you’re a seasoned baker or just starting, this Amish white bread recipe is perfect for anyone looking to enjoy homemade bread that’s both delicious and easy to make.
In this article, we’ll walk you through the classic Amish white bread recipe, providing all the tips and tricks for achieving that soft, airy, and slightly sweet loaf that has made this bread a beloved staple for generations.
### Why Amish White Bread Is So Special
Amish White Bread is popular for several reasons:
– **Simple Ingredients:** Made with basic pantry staples like flour, sugar, yeast, and salt, this bread recipe doesn’t require any fancy ingredients, making it both accessible and affordable.
– **Soft, Fluffy Texture:** The result is a wonderfully soft, slightly sweet loaf with a light, airy texture that’s perfect for sandwiches, toast, or just enjoying with a pat of butter.
– **Versatile:** This bread is perfect for every meal, whether you’re using it to make a hearty sandwich, serve with soup, or enjoy a slice with your morning coffee.
– **Homemade Appeal:** Baking your own bread gives you the satisfaction of creating something from scratch while filling your home with the comforting scent of freshly baked goods.
### Ingredients:
– **1 cup warm water** (110°F, about 43°C)
– **2 tablespoons white sugar**
– **2 1/4 teaspoons active dry yeast** (1 packet)
– **1/2 cup vegetable oil** (or melted butter for a richer flavor)
– **1 teaspoon salt**
– **1/4 cup white sugar** (for the dough)
– **3 1/2 to 4 cups all-purpose flour** (you may need more or less depending on your dough’s consistency)
### Instructions:
#### 1. **Activate the Yeast:**
Start by activating the yeast. In a large mixing bowl, combine the **warm water** and **2 tablespoons of sugar**. Stir gently until the sugar dissolves. Sprinkle the **active dry yeast** over the surface of the water, giving it a quick stir. Let this mixture sit for about 5-10 minutes, or until it becomes frothy and bubbly. This step is crucial for ensuring that the yeast is active and ready to help your dough rise.
#### 2. **Prepare the Dough:**
Once your yeast mixture is bubbly, add the **vegetable oil**, **salt**, and **1/4 cup sugar** to the bowl. Stir well to combine. Then, start adding the **flour**, a little bit at a time, mixing after each addition. Continue adding flour until the dough comes together into a soft ball that’s not too sticky. Depending on the humidity and the flour you use, you may need more or less flour. The goal is to achieve a dough that is soft but not overly sticky.
#### 3. **Knead the Dough:**
Transfer the dough to a lightly floured surface and knead it for about 5-7 minutes. To knead, press the dough down with the heels of your hands, fold it over, and then turn it a quarter turn. Repeat this process until the dough is smooth and elastic. If the dough feels too sticky, you can add a little more flour, but be careful not to add too much as it could make the bread dense.
#### 4. **First Rise:**
After kneading, form the dough into a ball and place it in a large, lightly oiled bowl. Turn the dough once to coat it in the oil, then cover the bowl with a clean kitchen towel or plastic wrap. Let the dough rise in a warm place for about 1 to 1 1/2 hours, or until it has doubled in size.
5. **Shape the Loaf:**
Once the dough has risen, punch it down gently to release the air. Turn the dough out onto a lightly floured surface and shape it into a loaf by flattening it into a rectangle and then rolling it up tightly, pinching the seams closed. Place the shaped dough into a greased 9×5-inch loaf pan, seam side down.
For Complete Cooking STEPS Please Head On Over To Next Page Or Open button (>) and don’t forget to SHARE with your Facebook friends
ADVERTISEMENT
