ADVERTISEMENT
### **Instructions:**
#### **Step 1: Prepare the Crust**
1. **Crush the graham crackers**: Place the **graham crackers** (or biscuits) in a food processor and pulse until finely crushed. Alternatively, you can put the crackers in a plastic bag and crush them with a rolling pin.
2. **Mix with sugar and butter**: In a mixing bowl, combine the **graham cracker crumbs** with **granulated sugar**. Pour in the **melted butter** and mix until the crumbs are well-coated and the mixture is slightly moist.
3. **Press into a pan**: Press the crumb mixture evenly into the bottom of a **9×13-inch baking dish** or similar-sized dish. Use the back of a spoon or your fingers to compact the crumbs firmly. Chill the crust in the refrigerator for about **15-20 minutes** to set.
#### **Step 2: Prepare the Cream Cheese Layer**
1. **Beat the cream cheese**: In a mixing bowl, beat the **softened cream cheese** until smooth and creamy. You can use an electric mixer or a whisk for this step.
2. **Add powdered sugar and vanilla**: Gradually add the **powdered sugar** and **vanilla extract** to the cream cheese, beating until fully combined and smooth.
3. **Fold in whipped topping**: Gently fold in the **whipped topping** (Cool Whip) until the mixture is smooth and fluffy. This creates a light, creamy texture that will make the filling incredibly delicious.
4. **Spread over the crust**: Once the cream cheese layer is ready, spread it evenly over the chilled graham cracker crust. Use a spatula to smooth it out so the filling covers the entire surface.
#### **Step 3: Add the Fruit Layer**
1. **Prepare the fruit**: Slice and chop the fresh fruits into bite-sized pieces. If you’re using strawberries, slice them thinly; for kiwis, peel and slice them into rounds or half-moons.
2. **Arrange the fruit**: Layer the fresh fruit over the cream cheese mixture, arranging it in a pattern or randomly, depending on your preference. You can use a combination of berries, kiwi, or any fruit that is in season or to your liking.
#### **Step 4: Add the Topping**
1. **Heat the fruit preserves**: In a small saucepan, heat the **fruit preserves** over low heat for about 1-2 minutes, just to soften them and make them easier to spread. You can skip this step if you’re using a jelly that’s already soft.
2. **Drizzle over the fruit**: Once the preserves are warm, carefully drizzle them over the fresh fruit layer. This adds a beautiful shine and a sweet glaze that helps to bind the fruit together.
#### **Step 5: Chill and Serve**
1. **Chill the dessert**: Place the dessert in the refrigerator and allow it to chill for at least **2-3 hours**, or preferably overnight. This gives the layers time to set and firm up.
2. **Serve and enjoy**: Once chilled and set, slice the dessert into squares and serve chilled. You can garnish with a few more fresh mint leaves or a dusting of powdered sugar for an added touch.
### **Why This Dessert is So Special:**
– **Layered Perfection**: Each bite delivers a combination of **crunchy crust**, **creamy filling**, and **fresh fruit**, offering a delightful mix of textures and flavors.
– **Refreshing and Light**: Perfect for hot weather, this no-bake dessert is refreshing and won’t leave you feeling heavy after eating.
– **Simple Ingredients**: With easy-to-find ingredients like graham crackers, cream cheese, and fresh fruit, this dessert is as simple as it is delicious.
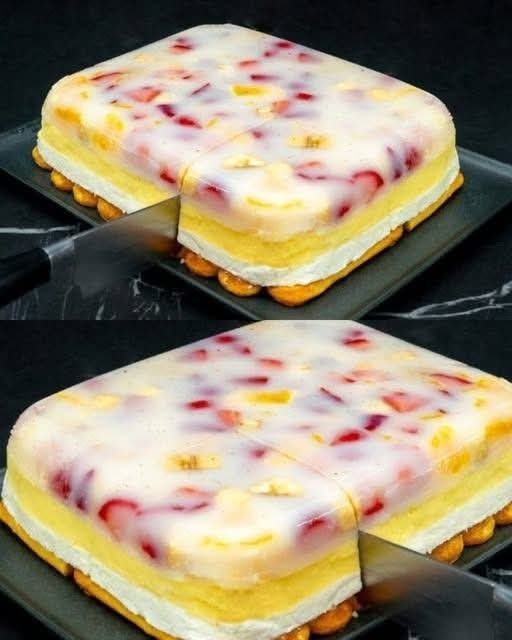
– **Visually Stunning**: The colorful layers of fruit not only taste fantastic but also make this dessert a visual showstopper.
### **Additional Tips and Variations:**
– **Mix up the fruit**: Feel free to experiment with different fruits depending on the season or your personal preferences. Tropical fruits like **mango** or **pineapple** work wonderfully, or you could even try **sliced peaches** or **blackberries**.
– **Add a little crunch**: For an extra layer of texture, you could add some **toasted coconut flakes** or **chopped nuts** like pecans or almonds as a garnish on top before serving.
– **Make it gluten-free**: Use gluten-free **cookies** (such as gluten-free graham crackers) for the crust, and you’ve got a gluten-free dessert option.
– **Layer it up**: For a more dramatic look, consider adding additional layers of fruit or even a thin layer of fruit jam in between the cream cheese and fruit layers.
### **Conclusion:**
This **No-Bake Four Layer Fruit Dessert** is an absolute showstopper that combines the best of freshness, creaminess, and crunch. Whether you’re making it for a summer gathering, a birthday party, or simply to enjoy at home, this dessert will quickly become a favorite. The combination of a buttery graham cracker crust, a luscious cream cheese layer, fresh seasonal fruits, and a sweet, glossy topping makes it a dessert that’s both indulgent and refreshing. Plus, with no baking required, it’s a breeze to prepare!
Give this dessert a try, and prepare to be amazed by how simple ingredients come together to create a wonderfully satisfying treat.
ADVERTISEMENT
