ADVERTISEMENT
#### **Step 3: Make a Baking Soda Paste**
While the grates are soaking, you can create a simple **baking soda paste** to clean the stove surface and burners. To make the paste, mix **baking soda** with a small amount of **water** until it forms a thick, spreadable consistency. This paste will act as a gentle abrasive that can break down grease without scratching your stove.
#### **Step 4: Apply the Baking Soda Paste to the Stove Burners**
Now it’s time to focus on the stove surface. Spread a generous layer of the **baking soda paste** onto the greasy burners and surrounding areas. Be sure to cover all the spots with noticeable grease or buildup. Let the paste sit for about **10-15 minutes** to allow it to break down the grime.
#### **Step 5: Scrub with a Microfiber Cloth or Sponge**
After the paste has had time to sit, grab a **microfiber cloth or non-abrasive sponge** and gently scrub the burners. Focus on the areas with heavy grease buildup and use circular motions to lift the grime. For stubborn spots, use a little more paste and continue scrubbing. The microfiber cloth will help trap grease and dirt, while also preventing scratching.
#### **Step 6: Use Vinegar to Break Down Stubborn Grease**
For those particularly tough grease spots that refuse to come off, spray or pour **white vinegar** directly onto the baking soda paste. The reaction between the **baking soda** and **vinegar** will help fizz up and lift the grease even further. Let the vinegar and baking soda fizz for a minute or two, then wipe it away with your cloth or sponge.
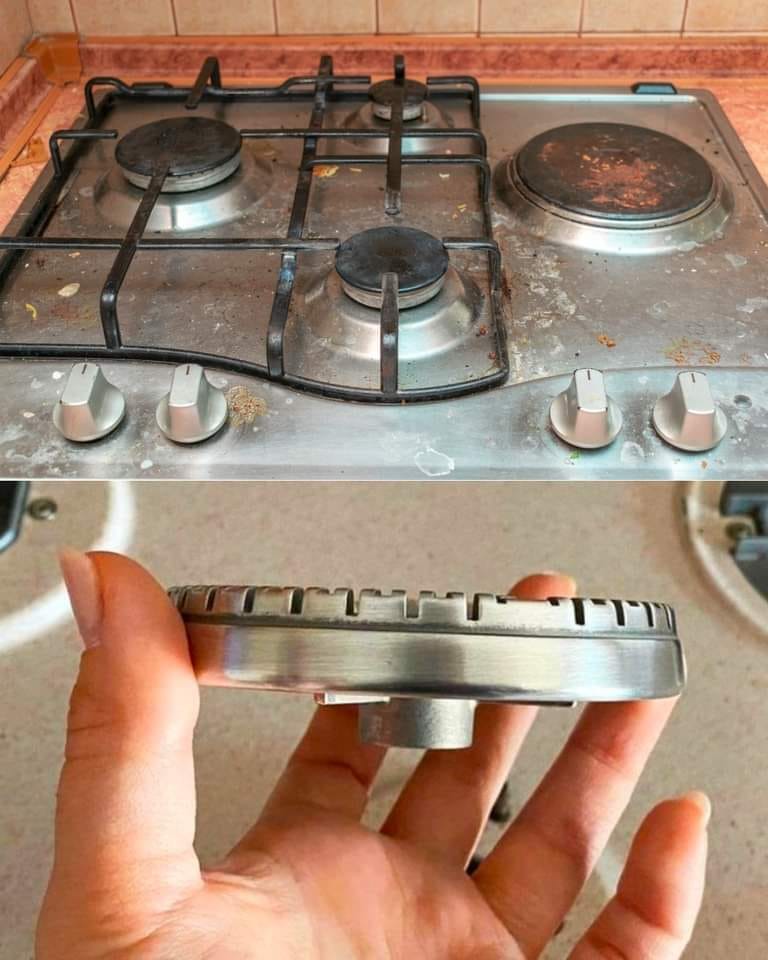
#### **Step 7: Clean the Burner Grates and Caps**
While your stove burners are getting cleaned, your burner grates and caps should be ready for the next step. After soaking, take a **toothbrush or soft scrub brush** and use it to scrub away any remaining grease or grime from the grates and caps. Be sure to pay attention to the corners and edges where grease tends to accumulate. Rinse the grates and caps thoroughly with warm water and let them dry completely.
#### **Step 8: Wipe Down the Stove**
Once all the burners are cleaned, give the stove surface a final wipe down with a clean, damp cloth to remove any leftover baking soda or vinegar residue. Dry the stove with a separate cloth to prevent streaks and water spots.
#### **Step 9: Reassemble and Enjoy Your Sparkling Stove**
Finally, once everything is dry, **reassemble** the burner grates, caps, and knobs. Step back and admire your sparkling, grease-free stove! You’ve successfully removed all that buildup, and your burners look as good as new.
### **Why This Method Works:**
This method combines a few key cleaning principles that make it effective:
– **Baking soda** acts as a gentle abrasive, helping to physically scrub away grease without scratching or damaging the burners.
– **Vinegar** works as a natural degreaser and helps dissolve stubborn grease spots, making them easier to clean.
– **Dish soap** helps break down oils, making it much easier to lift off grease from the stove surface and grates.
### **Additional Tips for Keeping Your Burners Clean:**
1. **Clean Up Spills Immediately**: If any grease or food spills while cooking, clean it up right away before it has time to harden and become more difficult to remove.
2. **Use a Protective Cover**: If you’re looking to keep your stove cleaner for longer, consider using burner covers to catch spills and splatters while cooking.
3. **Regular Maintenance**: Cleaning your burners and stove on a regular basis, even if it’s just a quick wipe down, can help prevent buildup and keep things looking fresh.
4. **Avoid Harsh Scrubbers**: Stay away from steel wool or abrasive scrubbing pads, as these can scratch the surface of your stove and cause permanent damage. Stick with gentle cloths, sponges, and soft brushes.
### **Conclusion:**
Degreasing your kitchen burners doesn’t have to be a daunting task. With just a few simple ingredients like **baking soda**, **vinegar**, and **dish soap**, you can quickly and easily restore your stove burners to their original gleam. By following this simple method, you’ll not only make your kitchen look cleaner, but you’ll also prolong the life of your stove. Say goodbye to greasy, grimy burners and hello to a sparkling, fresh kitchen!
ADVERTISEMENT
