ADVERTISEMENT
**How to Grow a Never-Ending Supply of Celery at Home in a Pot: A Step-by-Step Guide**
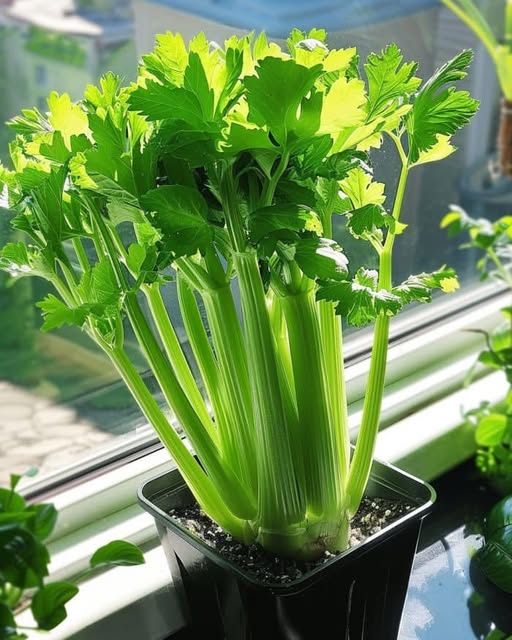
If you love celery and want a continuous supply of this crisp, nutritious vegetable without having to run to the store every time you need it, why not grow it yourself? Growing celery at home is easier than you might think, and you don’t need a huge garden to make it happen. With just a pot and a little bit of patience, you can grow celery indoors or on a balcony year-round, giving you a never-ending supply right at your fingertips.
Here’s a simple, step-by-step guide to growing celery at home in a pot. You’ll be harvesting fresh, homegrown celery in no time!
—
### **Why Grow Celery at Home?**
1. **Convenience**: Having celery growing right at home means you never have to worry about running out or buying it from the store.
2. **Freshness**: Homegrown celery is often fresher, crunchier, and more flavorful than store-bought varieties.
3. **Cost-effective**: Instead of buying celery every week, you can keep growing it, saving money in the long run.
4. **Sustainability**: Growing your own vegetables reduces food waste and your carbon footprint.
—
### **What You’ll Need:**
– **Celery stalks** (preferably organic, since they have fewer chemicals and pesticides)
– **A pot or container** (at least 8 inches deep and wide enough to accommodate celery’s roots)
– **Well-draining soil** (loamy soil works best)
– **Watering can or spray bottle**
– **A sunny spot** (Celery needs about 6 hours of sunlight per day)
– **Fertilizer** (organic, optional)
—
### **Step-by-Step Guide to Growing Celery in a Pot:**
#### **1. Start with Celery Stalks**
– To begin growing celery, you can use the base of an already-purchased celery bunch. Choose stalks with the roots still attached. If you’re using store-bought celery, make sure it’s organic if possible.
– **Cut the stalks** about **2-3 inches** from the bottom of the bunch, leaving the root end intact. You can use the remaining celery for cooking or snacks!
#### **2. Set Up Your Pot**
– Select a pot that’s at least **8 inches deep** (celery has long roots), and make sure it has drainage holes. Celery prefers a well-draining, rich soil that can hold moisture without becoming waterlogged.
– Fill the pot with **loamy soil**, leaving about an inch from the top so the soil doesn’t overflow when you water.
#### **3. Place the Celery in Water (Optional)**
– For an extra boost, place the cut end of the celery stalk in a shallow bowl of **water**. Make sure the root end is submerged but the upper stalk remains dry.
– Place the bowl in a sunny spot, and after about **3-5 days**, you should notice the celery beginning to sprout new leaves and roots from the base.
**4. Plant the Celery in the Pot**
– After the celery stalk has developed enough roots (usually when you see new shoots or roots that are **1-2 inches** long), it’s time to transplant it into the pot.
– Make a small hole in the center of the pot’s soil and gently place the celery stalk in it. Cover the roots with soil, making sure that the base of the stalk is level with the surface of the soil.
– Water the plant well, making sure the soil is evenly moist but not soggy. Celery thrives in moist soil, so be sure to keep it consistently damp.
For Complete Cooking STEPS Please Head On Over To Next Page Or Open button (>) and don’t forget to SHARE with your Facebook friends
ADVERTISEMENT
