ADVERTISEMENT
—
### **Step-by-Step Instructions:**
#### **Step 1: Activate the Yeast**
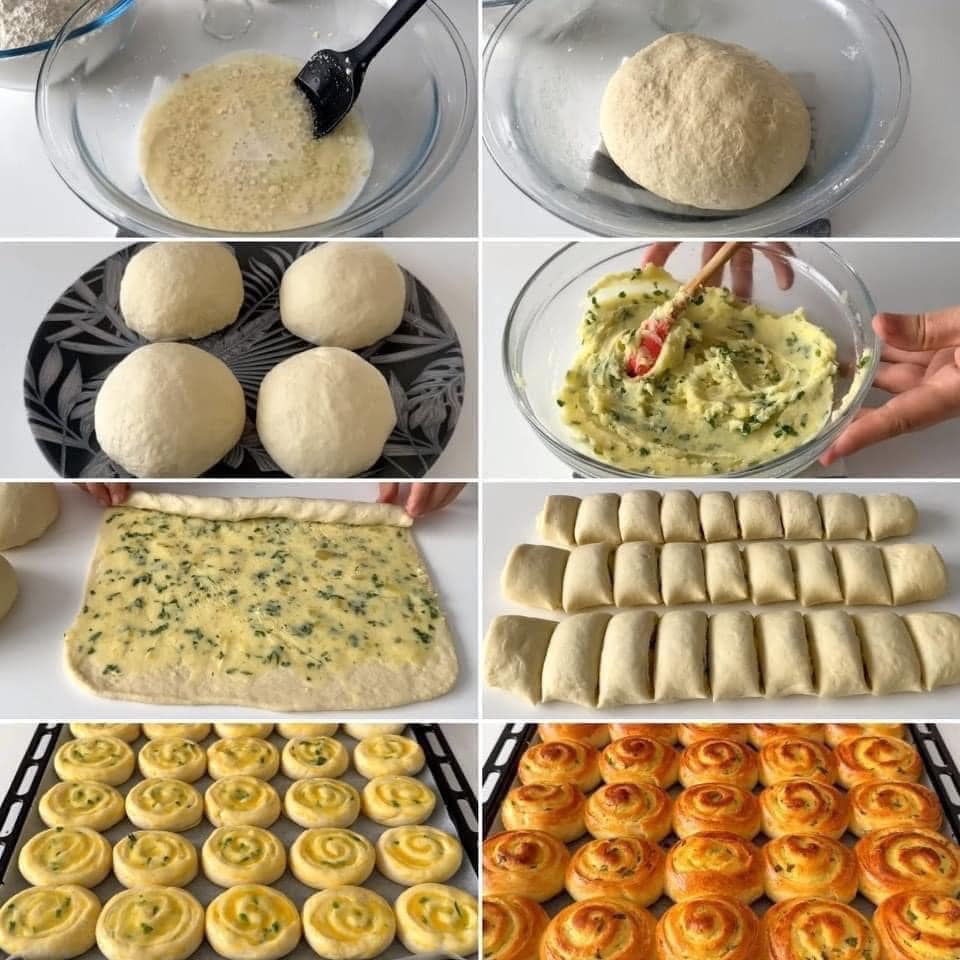
Begin by activating the yeast. In a small bowl, combine the **warm water** and **granulated sugar**, stirring to dissolve the sugar. Sprinkle the yeast over the surface of the water and stir gently. Let it sit for 5 to 10 minutes until the yeast becomes foamy and bubbly. This step ensures that your yeast is active and will help the dough rise.
#### **Step 2: Mix the Dough**
In a large mixing bowl, combine the **flour** and **salt**. Create a small well in the center of the flour mixture and pour in the activated yeast mixture, **warm milk**, **egg**, and **vanilla extract**. Use a spoon or a dough hook to mix the ingredients together. As the dough begins to come together, add the **softened butter** in small pieces. Continue mixing until the dough is smooth and slightly sticky.
#### **Step 3: Knead the Dough**
Once the dough is mixed, transfer it to a lightly floured surface. Knead the dough for about **5 to 7 minutes**, until it becomes smooth and elastic. If the dough is too sticky, sprinkle in small amounts of flour as needed, but avoid adding too much flour to keep the dough soft.
#### **Step 4: Let the Dough Rise**
Place the kneaded dough in a lightly oiled bowl and cover it with a clean kitchen towel or plastic wrap. Allow the dough to rise in a warm, draft-free area for about **1 to 1.5 hours**, or until it doubles in size. This step allows the yeast to work, creating the soft, airy texture that you’re after.
#### **Step 5: Roll Out the Dough**
After the dough has risen, punch it down to release any air bubbles. Transfer it to a floured surface and roll it out into a large rectangle, about **1/4 inch thick**. You can then cut the dough into smaller squares, triangles, or rectangles, depending on the shape you prefer for your pastries.
#### **Step 6: Add the Filling (Optional)**
If you’d like to fill your pastries, now is the time to add your favorite filling! For sweet pastries, place a small spoonful of fruit preserves, chocolate spread, or cinnamon sugar in the center of each dough square. For savory pastries, you can add a spoonful of cheese and herbs. Be sure not to overfill, as it may be difficult to seal the pastries properly.
#### **Step 7: Fold and Seal**
Fold the dough over the filling to create a pocket or a triangle shape. Pinch the edges together tightly to seal the pastries. If you’re making open pastries like turnovers or tarts, simply fold the edges over and press gently to form a rustic shape.
#### **Step 8: Egg Wash and Bake**
Place the prepared pastries on a parchment-lined baking sheet. Brush the tops of each pastry with the **egg wash** (beaten egg and water) to give them a beautiful golden finish when baked.
Bake the pastries in a preheated oven at **375°F (190°C)** for **15 to 20 minutes**, or until the pastries are golden brown and puffed. The baking time may vary slightly depending on the size and filling of your pastries, so keep an eye on them toward the end.
#### **Step 9: Cool and Serve**
Once baked, remove the pastries from the oven and allow them to cool on a wire rack for a few minutes. Serve warm for the best flavor and texture. Whether you’re enjoying them with a cup of coffee for breakfast or as a sweet treat after dinner, these soft pastries are sure to delight.
—
### **Tips for Perfect Pastries:**
– **Use Cold Butter**: For extra flakiness, ensure that your butter is cold when incorporated into the dough. This will help create those desirable buttery layers as the dough bakes.
– **Resting Time Is Key**: Be patient and allow the dough to rise fully. This is what gives the pastries their soft and fluffy texture.
– **Try Different Fillings**: Get creative with your fillings! Sweet fruit preserves, chocolate chips, or even savory combinations like spinach and feta or ham and cheese can all be used for a variety of flavors.
– **Store Leftovers Properly**: If you have leftover pastries, store them in an airtight container. You can also freeze them for up to 2 months and reheat in the oven when you’re ready to enjoy.
—
### **Conclusion: A Soft, Fluffy Pastry for Every Occasion**
This soft pastry recipe is perfect for beginners and experienced bakers alike. With its delicate, fluffy texture and versatility, you can enjoy these pastries with a variety of fillings to suit your taste. Whether you’re making them for a special breakfast, an afternoon snack, or as part of a festive dessert spread, these homemade pastries are bound to impress.
So, roll up your sleeves, grab the ingredients, and try this easy yet delicious recipe. You’ll be rewarded with soft, melt-in-your-mouth pastries that will elevate any meal or celebration. Enjoy the process, and most importantly, enjoy the delicious results!
ADVERTISEMENT
