ADVERTISEMENT
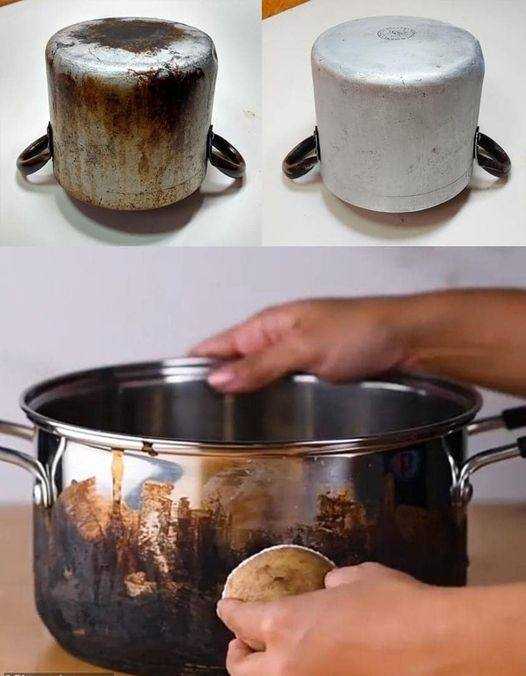
**The Secret Ingredient That Instantly Removes Burns from Pots and Pans**
We’ve all been there: you’re cooking up a storm in the kitchen, only to turn your back for a second, and *bam*—you’ve got a stubborn burn mark on your favorite pot or pan. Burned-on food can be a real nightmare to clean, and while it’s tempting to reach for harsh chemical cleaners, there’s a much simpler and safer solution that works wonders—and it’s probably already in your kitchen.
What’s the secret ingredient? **Baking soda**!
Yes, that humble, versatile powder that you likely already use in baking or to freshen up your fridge is the hero ingredient when it comes to cleaning burned pots and pans. It’s natural, gentle, and incredibly effective at lifting stubborn stains without damaging your cookware. Here’s how baking soda can save the day and how to use it to instantly remove burns from your pots and pans.
### Why Baking Soda Works So Well
Baking soda, also known as sodium bicarbonate, is a mildly alkaline compound that reacts with acids and grease. This makes it the perfect tool for lifting and breaking down the charred remnants and food stains that tend to cling to cookware after a cooking mishap. Plus, it’s non-toxic, so you can use it without worrying about introducing harsh chemicals into your kitchen.
When it comes to removing burns, baking soda acts as a gentle abrasive to scrub away stubborn stains while also neutralizing odors. It’s a natural cleaner that works on everything from pots and pans to sinks, stovetops, and even ovens.
### How to Use Baking Soda to Remove Burns from Pots and Pans
Now that you know why it works, here’s a step-by-step guide on how to use baking soda to clean those stubborn burn marks from your cookware:
#### What You’ll Need:
– **Baking soda**
– **Water**
– **A soft sponge or cloth**
– **A bit of elbow grease**
#### Step-by-Step Instructions:
1. **Add Baking Soda**: Start by sprinkling a generous amount of baking soda directly onto the burned area of your pot or pan. You don’t need to measure it exactly—just cover the burned spots with a good coating of the powder.
2. **Add Water**: Pour a small amount of warm water over the baking soda. The goal here is to create a paste-like consistency. Add just enough water to wet the baking soda and form a thick paste that will stick to the surface.
3. **Let It Sit**: Allow the baking soda paste to sit on the burned area for at least 15 minutes—longer if the burns are particularly stubborn. This gives the baking soda time to work its magic by loosening up the charred bits and grime.
4. **Scrub Gently**: After the paste has had time to sit, take a soft sponge or cloth (something non-abrasive, so you don’t scratch the surface of your cookware) and start scrubbing gently in a circular motion. The baking soda paste will act as a mild abrasive, helping to lift away the burned food without damaging your pot or pan.
5. **Rinse and Repeat if Necessary**: Once you’ve scrubbed the area, rinse the pot or pan with warm water. You should notice that the burn marks have lightened or even completely disappeared! If there’s still some residue left, repeat the process—just add a bit more baking soda and water and scrub again.
6. **Final Rinse**: Once the burn marks are gone, give your cookware a final rinse to remove any leftover baking soda. You’ll be left with a clean, shiny surface!
For Complete Cooking STEPS Please Head On Over To Next Page Or Open button (>) and don’t forget to SHARE with your Facebook friends
ADVERTISEMENT
