ADVERTISEMENT
### **Instructions:**
#### **Step 1: Whip the Cream**
Start by placing the heavy whipping cream in a large mixing bowl. Use a hand mixer or stand mixer to beat the cream until soft peaks form. You don’t want it to be too stiff – just whipped enough to give the salad a fluffy texture. Set aside.
#### **Step 2: Make the Creamy Dressing**
In a separate bowl, combine the mayonnaise, powdered sugar, and vanilla extract. Stir until smooth and well blended. The mayonnaise might seem unconventional, but it helps balance out the sweetness and gives the fruit salad that classic creamy consistency.
#### **Step 3: Fold Together the Ingredients**
Gently fold the whipped cream into the mayonnaise mixture. Take your time to mix it thoroughly but carefully, so the whipped cream doesn’t lose its airiness.
#### **Step 4: Add the Fruit and Mix**
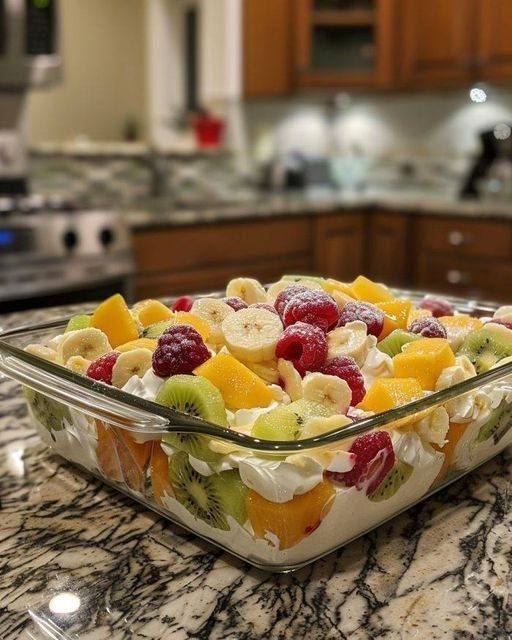
Once your creamy base is ready, it’s time to add the fruit. Begin by adding the pineapple chunks, strawberries, mandarin oranges, chopped bananas, and coconut flakes. If you’re using marshmallows, now’s the time to add those as well. Gently fold the fruit and marshmallows into the mixture, making sure everything is evenly coated with the creamy dressing.
#### **Step 5: Freeze**
Transfer the fruit salad mixture into a large freezer-safe dish or individual serving cups. Spread it out evenly, cover, and place it in the freezer. Let it freeze for at least 4-6 hours or until solid. For best results, you can even freeze it overnight.
#### **Step 6: Serve and Enjoy**
Once the fruit salad is frozen, take it out of the freezer and let it sit for a few minutes to soften slightly for easier scooping. Serve chilled and enjoy the creamy, fruity goodness. It’s a refreshing treat that’s perfect for any time of year!
### **Tips for Perfecting Nana’s Frozen Fruit Salad**
– **Use Fresh Fruit**: Fresh fruit gives the salad the best flavor, but canned fruit is also a great option if you’re in a pinch. Just make sure to drain the canned fruit thoroughly to avoid extra liquid in the salad.
– **Customizing the Fruit**: Feel free to mix and match your favorite fruits. Mangoes, grapes, or even kiwi would be wonderful additions. The more colorful, the better!
– **Adjust the Sweetness**: Depending on the sweetness of your fruit, you may want to adjust the amount of powdered sugar. Taste the mixture before freezing and add a little more sugar if you prefer a sweeter salad.
– **Make It Ahead**: This is a great make-ahead dish for holidays, potlucks, or barbecues. You can prepare it a day or two ahead of time, leaving you with one less thing to worry about on the big day.
### **Why This Recipe is a Family Favorite**
There’s something undeniably comforting about eating a dish that’s been passed down through the generations. Nana’s Frozen Fruit Salad brings back memories of family gatherings and special occasions where everyone would gather around the table, share stories, and enjoy delicious food.
This recipe is more than just a dish – it’s a part of your family’s history and a way to keep those cherished memories alive, one scoop at a time. And with its simple ingredients and easy-to-follow steps, it’s a recipe that anyone can make and enjoy.
### **Conclusion**
If you’re looking for a refreshing, delicious, and easy-to-make treat for your next family gathering or summer picnic, Nana’s Frozen Fruit Salad is the answer. It’s a timeless recipe that has been loved by generations, and it’s sure to win over anyone who tries it. The creamy texture, sweet fruits, and cool, frozen consistency make it the perfect dish for any occasion.
So, gather the ingredients, channel Nana’s kitchen wisdom, and get ready to serve a dessert that will have everyone coming back for more. Enjoy!
ADVERTISEMENT
