ADVERTISEMENT
#### Instructions:
**Step 1: Combine the Ingredients**
1. In a medium saucepan, combine the unsweetened almond milk, powdered erythritol, and coconut cream. Stir well to combine, ensuring the erythritol is evenly distributed.
**Step 2: Heat and Stir**
1. Place the saucepan over medium heat. Stir the mixture continuously to prevent the ingredients from burning or sticking to the bottom of the pan. Keep stirring until the erythritol has fully dissolved and the mixture begins to thicken.
**Step 3: Simmer and Reduce**
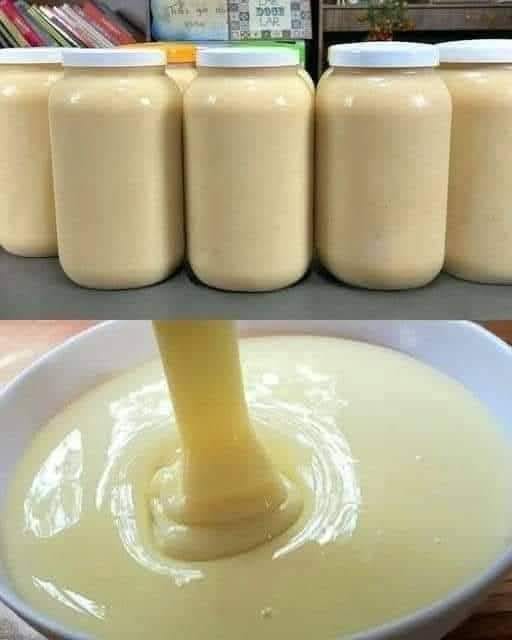
1. Let the mixture simmer for about 10-15 minutes, stirring often. As it simmers, the liquid will reduce and thicken into a creamy, condensed milk-like consistency.
**Step 4: Check Consistency**
1. To test the consistency, dip a spoon into the mixture. If it coats the back of the spoon, it’s ready. If it’s still too thin, continue simmering for another 5-10 minutes.
**Step 5: Cool and Store**
1. Once thickened, remove the saucepan from the heat and let the sugar-free condensed milk cool to room temperature. It will continue to thicken as it cools.
2. Transfer the cooled condensed milk to an airtight container and store it in the refrigerator for up to a week.
**Step 6: Enjoy!**
1. Use your sugar-free condensed milk in any recipe that calls for the sweetened variety. It’s perfect for desserts, coffee, smoothies, or even drizzling over fruits for a quick, satisfying treat.
### Tips for Perfect Sugar-Free Condensed Milk:
– **Adjust Sweetness**: If you prefer your condensed milk to be sweeter, you can adjust the amount of erythritol or sweetener to taste. You could also try other low-carb sweeteners like monk fruit or stevia, depending on your preference.
– **Use Full-Fat Coconut Cream**: For the richest, creamiest texture, use full-fat coconut cream. It gives a beautiful, velvety finish that mimics the consistency of traditional sweetened condensed milk.
– **Flavor Variations**: If you want to add a little extra flavor to your condensed milk, consider adding a splash of vanilla extract, a pinch of salt, or even a touch of cinnamon or nutmeg.
– **Consistency Tips**: If your condensed milk turns out too thick after cooling, you can thin it out by adding a little more unsweetened almond milk. If it’s too thin, simmer it for a bit longer until it reaches the desired consistency.
– **Storage**: Keep your homemade sugar-free condensed milk in the fridge for up to a week. It will solidify a little bit as it cools, but you can gently warm it up before using it again if needed.
### Uses for Sugar-Free Condensed Milk:
Now that you have your homemade sugar-free condensed milk, the possibilities are endless! Here are just a few ideas for how to use it:
1. **In Coffee or Tea**: Add a spoonful to your morning coffee or tea for a rich, creamy, low-sugar treat.
2. **In Baking**: Use it in recipes like sugar-free pies, cakes, cookies, or bars. It works as a great substitute for regular condensed milk in many baking recipes.
3. **In Smoothies**: Blend a little into your smoothies for extra creaminess and a touch of sweetness.
4. **For Desserts**: Drizzle it over fresh fruit, yogurt, or even sugar-free ice cream for a quick, indulgent dessert.
5. **Homemade Fudge**: Mix it with sugar-free chocolate and a bit of vanilla extract to make sugar-free fudge.
6. **Pies and Tarts**: It’s a perfect base for sugar-free cream pies or tarts—just combine it with whipped cream or use it in a no-bake dessert.
### Health Benefits of Sugar-Free Condensed Milk:
– **Low-Carb**: By substituting sugar with erythritol, a sugar alcohol, this condensed milk is low in carbs and can fit perfectly into keto or low-carb diets.
– **Dairy-Free**: If you use coconut cream or almond milk, this recipe is dairy-free, making it suitable for those with lactose intolerance or those following a vegan lifestyle.
– **Better for Blood Sugar**: The use of sugar substitutes like erythritol means that this condensed milk doesn’t cause a spike in blood sugar levels, making it a great option for people with diabetes or those monitoring their sugar intake.
### Conclusion:
Making **sugar-free condensed milk** at home with just three ingredients is a game-changer for anyone looking to reduce sugar in their diet while still enjoying the creamy goodness of this beloved ingredient. Whether you’re using it for baking, in drinks, or as a topping for your favorite desserts, this simple, homemade alternative will become your go-to recipe for sugar-free indulgence.
It’s easy, customizable, and so much healthier than store-bought versions. With just a little time and effort, you can enjoy all the sweetness and richness of traditional condensed milk—without the sugar! Try it out today and start creating guilt-free treats!
ADVERTISEMENT
