ADVERTISEMENT
– **Warm water**
### Step-by-Step Guide to Cleaning Your Faucets
#### Step 1: Gather Your Supplies
Before you start, gather your cleaning materials:
– If you’re dealing with light stains or mineral deposits, **white vinegar** will be your best friend.
– **Baking soda** is perfect for tackling stubborn stains or grime.
– For an extra fresh touch, **lemon** can be used to brighten the faucet and provide a natural citrus fragrance.
#### Step 2: Turn Off the Water Supply
While this step is optional, it’s always a good idea to **turn off the water supply** to your faucet before cleaning. This way, you’ll avoid any potential mess or splashing.
#### Step 3: Remove Loose Debris
Use a **microfiber cloth** to wipe down the faucet and remove any loose dust or debris. Make sure to get into the crevices and around the base to remove anything that may interfere with cleaning.
#### Step 4: Clean the Faucet Handles
The handles of your faucets can accumulate soap scum, dirt, and oil from hands. To clean them:
– Soak a **microfiber cloth** in warm, soapy water, and gently wipe down the handles.
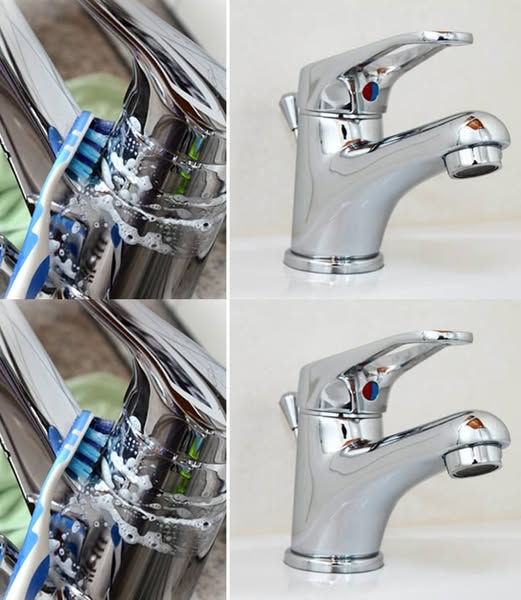
– For tougher grime, use a **baking soda paste** (mix equal parts baking soda and water), and gently scrub with a soft cloth or toothbrush. Baking soda’s mild abrasiveness makes it perfect for removing grease without damaging the finish.
– Rinse and wipe down with clean water.
#### Step 5: Remove Mineral Deposits with Vinegar
Hard water stains and mineral deposits are a common issue, especially in bathrooms and kitchens. To remove them:
– Soak a **clean cloth or paper towel** in **white vinegar** and wrap it around the faucet, focusing on areas with visible mineral buildup.
– For stubborn stains, use a **sandwich bag** filled with vinegar. Place the bag over the faucet and secure it with a rubber band. Let it sit for **15-30 minutes** to allow the vinegar to break down the mineral deposits.
– After soaking, use a **soft cloth or toothbrush** to scrub away any remaining stains.
#### Step 6: Tackle the Aerator
The aerator (the screen at the tip of your faucet) can often get clogged with debris and mineral buildup, affecting the water flow.
– To clean the aerator, simply **unscrew** it from the faucet (use pliers if it’s tight).
– Soak it in **white vinegar** for **15-20 minutes** to dissolve any mineral buildup.
– After soaking, scrub the aerator with an old toothbrush and rinse it thoroughly.
– Reattach it to the faucet.
#### Step 7: Use Lemon for a Natural Shine
For an extra touch of shine, use **lemon** to brighten and polish the faucet. The natural acids in lemon work as a gentle cleaner while adding a fresh scent.
– Cut a **lemon in half** and rub the cut side directly on the faucet. You can also squeeze the juice into a microfiber cloth and wipe down the faucet.
– Leave it for a few minutes and wipe it off with a clean, dry cloth for an extra glossy finish.
#### Step 8: Dry and Buff the Faucet
After cleaning, it’s essential to dry your faucet thoroughly to prevent water spots and streaks. Use a **dry microfiber cloth** to buff the surface gently.
– Be sure to pay attention to any areas around the base and spout where water tends to gather and dry.
– Buffing will restore the faucet’s shine and give it a polished, like-new appearance.
### Tips for Different Types of Faucets
– **Chrome Faucets**: Chrome tends to develop water spots and fingerprints easily. To remove these, use a **vinegar-water solution** and finish off with a lemon wipe and buffing to keep it gleaming.
– **Stainless Steel Faucets**: Stainless steel is resistant to corrosion but can show water spots. For cleaning, use a **vinegar-water solution** and avoid using abrasive scrubbing pads. Dry and buff immediately to avoid streaking.
– **Brushed Nickel Faucets**: These faucets are more resistant to fingerprints and water spots. Clean them using **warm soapy water** and avoid harsh chemicals, which can damage the finish. Always dry immediately after cleaning to prevent streaks.
### Preventing Future Buildup
To keep your faucets looking fresh, follow these simple tips:
– **Wipe after use**: Make a habit of wiping down the faucet after each use, especially in the kitchen where grease and soap scum can build up quickly.
– **Use a water softener**: If you live in an area with hard water, consider installing a **water softener** to reduce mineral deposits and keep your faucets cleaner for longer.
– **Regular maintenance**: Clean your faucets at least once a week to prevent grime buildup and keep them sparkling.
### Conclusion
Cleaning your faucets doesn’t have to be a daunting task. With these simple steps and household ingredients, you can make your faucets look like new in no time! Whether you’re dealing with mineral deposits, soap scum, or general grime, this DIY cleaning guide will help restore the shine and luster to your faucets without the need for harsh chemicals or expensive cleaners.
Regular cleaning and maintenance will ensure that your faucets remain in great condition, giving your bathroom or kitchen a fresh, polished look. So grab that vinegar, baking soda, and lemon, and start cleaning—your faucets will thank you!
ADVERTISEMENT
