ADVERTISEMENT
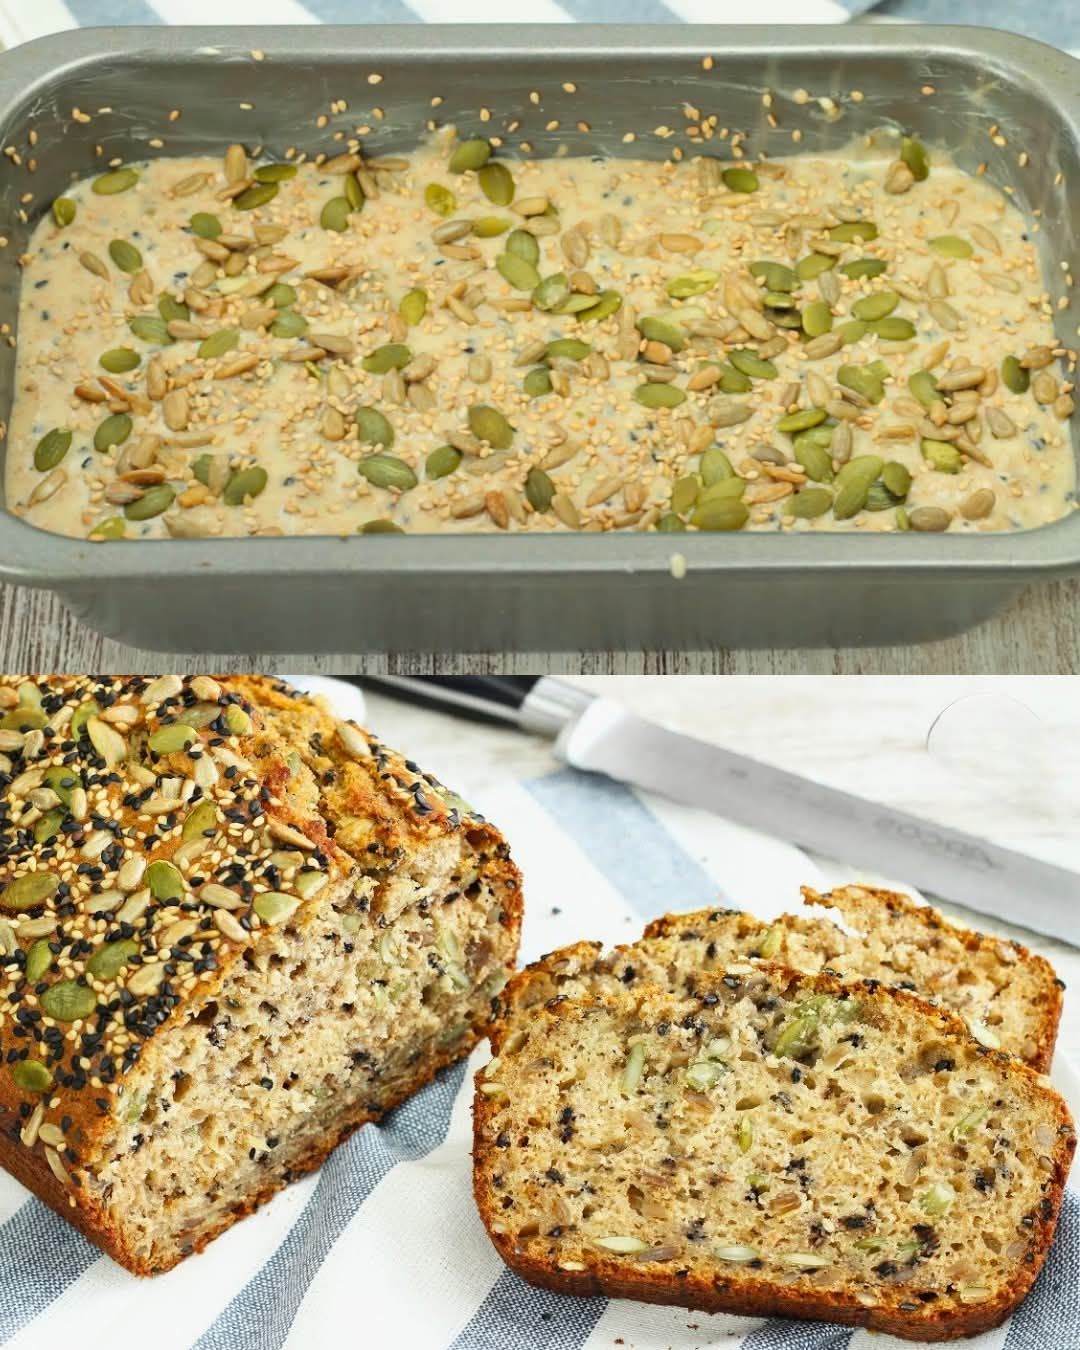
### How to Make No-Knead Multi-Seed Bread
**Step 1: Activate the Yeast**
In a small bowl, combine the warm water and sugar. Sprinkle the yeast over the water and give it a quick stir. Let it sit for about 5 minutes until it becomes frothy. This shows that the yeast is active and ready to use.
**Step 2: Mix the Dough**
In a large mixing bowl, combine the flour and salt. Add the activated yeast mixture, along with the olive oil (if using), and stir until the dough comes together. Once the dough starts to form, add the seeds—sunflower, pumpkin, sesame, and flax—and mix them in evenly.
**Step 3: Rest and Rise**
Cover the bowl with a clean kitchen towel or plastic wrap and let the dough rest in a warm place for about 2 hours, or until it has doubled in size. This resting period allows the yeast to do its magic and create air bubbles, resulting in a light, airy loaf.
**Step 4: Shape the Dough**
After the dough has risen, it will be slightly sticky. Generously flour your hands and a work surface, then turn the dough out onto the counter. Shape it into a rough round or oval loaf. If desired, you can sprinkle more seeds on top for extra texture and visual appeal.
**Step 5: Second Rise**
Place the shaped dough onto a parchment-lined baking sheet or into a greased Dutch oven if you want a crustier loaf. Cover the dough again and let it rise for another 30 minutes to 1 hour, or until it has puffed up.
**Step 6: Bake the Bread**
Preheat your oven to 450°F (230°C). If using a Dutch oven, place the lid on the pot, and bake for 25 minutes. Then, remove the lid and bake for an additional 15–20 minutes, or until the bread is golden brown and sounds hollow when tapped on the bottom.
If baking on a sheet pan, place the loaf in the oven for about 30-35 minutes until the top is golden and the bread sounds hollow when tapped.
**Step 7: Cool and Serve**
Once the bread is done, remove it from the oven and place it on a wire rack to cool completely before slicing. Letting the bread cool ensures that the texture sets properly.
### Tips for Perfect No-Knead Multi-Seed Bread
1. **Flour Variations**: Experiment with different types of flour, such as whole wheat, rye, or spelt, to create a bread with unique flavors and textures. Just keep in mind that whole wheat flour may require slightly more water.
2. **Seed Substitutions**: Feel free to customize the seed mixture based on what you have on hand or your personal preferences. Chia seeds, hemp seeds, or even sunflower or sesame seed butter can be added for variety.
3. **Storage**: This multi-seed bread is best stored in an airtight container or wrapped in a clean kitchen towel. It will stay fresh for up to 3 days at room temperature or can be stored in the fridge for longer shelf life.
4. **Serving Suggestions**: This bread is great with a spread of butter, avocado, or a slice of cheese. It also makes a fantastic base for sandwiches, from classic turkey and cheese to vegetarian options like hummus and roasted vegetables.
### Why This No-Knead Multi-Seed Bread is a Game Changer
This **No-Knead Multi-Seed Bread** is the perfect introduction to bread baking for beginners and a reliable recipe for seasoned bakers. It’s full of wholesome seeds that give the bread not only flavor but a good dose of nutrients, making it an excellent choice for anyone looking to add more fiber and healthy fats to their diet.
Not only is the bread easy to make, but it also brings the warm, comforting smell of freshly baked bread into your home without any of the complicated steps usually involved in bread making. Whether you’re enjoying a slice with your morning coffee, creating a delicious sandwich, or serving it with soup or a salad, this multi-seed bread is sure to become a favorite in your household.
### Conclusion
Making bread doesn’t have to be intimidating. This **No-Knead Multi-Seed Bread** is the perfect recipe for anyone who loves fresh, homemade bread without all the effort. With its hearty, nutty flavor and crunchy texture, this bread is a nutritious and satisfying addition to any meal. Whether you’re a novice or a seasoned baker, this simple yet delicious recipe is a must-try. Enjoy the comfort of freshly baked bread in just a few easy steps, and share the joy of this wholesome loaf with your loved ones.
ADVERTISEMENT
