ADVERTISEMENT
—
### **Step-by-Step Instructions**
#### **1. Create the Cleaning Paste**
1. In a small bowl, combine **1/2 cup of baking soda** with enough **water** (about 2-3 tablespoons) to form a thick paste.
2. Add **1 tablespoon of dish soap** to the paste. Dish soap helps break down grease, making the cleaning process more effective.
3. (Optional) For a pleasant scent and extra cleaning power, add **1 tablespoon of lemon juice**. This also helps cut through stubborn grease and leaves your kitchen smelling fresh.
#### **2. Apply the Paste**
1. Using a soft cloth or a spatula, spread the paste evenly over the stovetop or inside your oven, focusing on areas with heavy grease buildup, stains, or food splatters.
2. For stubborn areas or burnt-on food, you can let the paste sit for **15-30 minutes** to allow it to break down the grime.
#### **3. Scrub Away the Grime**
1. After the paste has had time to sit, use a non-abrasive sponge or scrub brush to scrub the surfaces gently. Focus on areas that need extra attention, like around the burners or oven racks.
2. You can use a toothbrush for tight spots, such as around knobs or in hard-to-reach corners.
#### **4. Rinse and Wipe Clean**
1. Fill a spray bottle with **1 cup of white vinegar** and **1 cup of water**. Spray this mixture onto the cleaned surface, which will react with the baking soda, helping to lift away grime and residue.
2. Wipe down the stove or oven with a clean, damp cloth to remove any remaining cleaner and food debris.
3. For a final shine, wipe everything with a dry towel or paper towel.
#### **5. Finish and Enjoy**
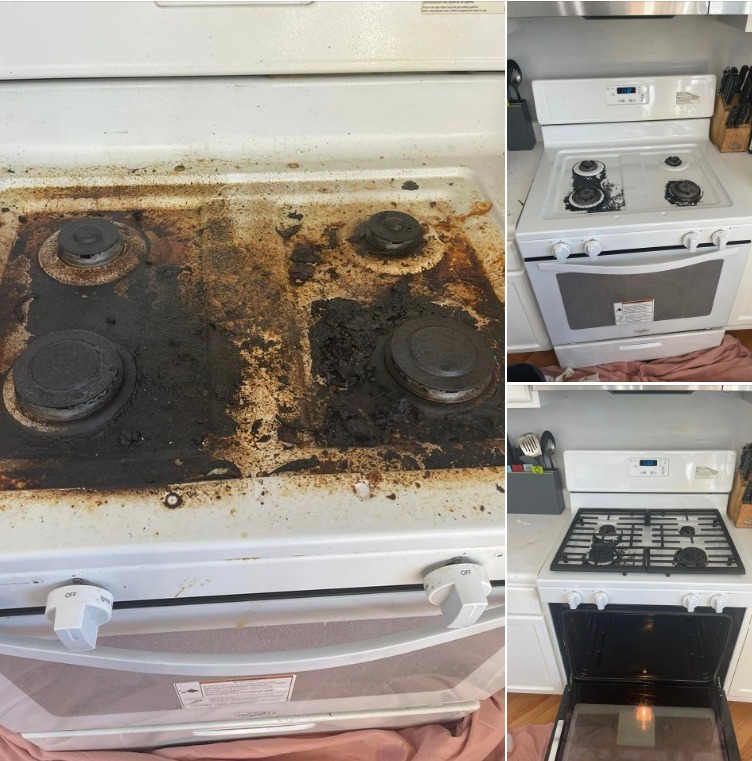
1. Your stovetop should now be sparkling clean, with no leftover grime, grease, or food stains. The surface should be smooth and free from streaks.
2. The vinegar mixture also helps remove odors, leaving your kitchen smelling fresh and clean.
—
### **Tips for Best Results**
– **For Tough Baked-On Grease:** If the grease is particularly tough, apply a thicker layer of the paste and let it sit overnight. The baking soda will soften the residue, making it easier to scrub away.
– **For Oven Racks:** Remove the racks from the oven and soak them in warm water with a bit of dish soap and baking soda for an hour or more. After soaking, scrub them with a non-abrasive scrub brush.
– **For Glass Oven Doors:** For a streak-free finish, use a soft cloth to apply a mixture of equal parts vinegar and water to the glass after cleaning. Buff with a dry cloth for shine.
– **Routine Maintenance:** To keep your oven and stovetop looking clean, wipe them down regularly with a damp cloth to catch spills before they build up.
—
### **Why This Homemade Oven Cleanser Works**
– **Baking Soda:** Its mildly abrasive nature makes it perfect for tackling stubborn grease and stains without scratching surfaces. It also deodorizes, neutralizing any lingering smells.
– **Vinegar:** Known for its ability to dissolve grease and grime, vinegar’s acidity breaks down stubborn residues, making them easier to wipe away. It also serves as a natural disinfectant.
– **Dish Soap:** It helps break down oils and fats, which are common on stovetops, making the cleaning process more effective.
– **Lemon Juice:** The natural acidity of lemon juice not only helps cut through grease but also leaves a refreshing scent behind.
—
### **Conclusion: Sparkling Stoves with Natural Ingredients**
With this **Homemade Oven Cleanser**, your stove can stay spotless without the need for harsh chemicals. The combination of baking soda, vinegar, dish soap, and optional lemon juice creates an effective, non-toxic cleaner that will leave your stove gleaming and smelling fresh.
This simple recipe is perfect for anyone looking for an eco-friendly, budget-conscious alternative to commercial oven cleaners. It’s quick, efficient, and gentle on both your stovetop and the environment.
Try this easy, homemade recipe next time your stove needs a little TLC, and enjoy a sparkling kitchen without the harsh fumes or chemical residue!
ADVERTISEMENT
