ADVERTISEMENT
#### **1. Prepare the Orchid Plant**
If your orchid is currently in soil, gently remove it from the pot and clean off any excess soil. Be very careful not to damage the delicate roots. You may need to trim any dead or rotting roots with a clean, sharp pair of scissors.
Once the roots are free from soil, rinse the roots gently with lukewarm water. This will help you remove any dirt or soil remnants. A small amount of hydrogen peroxide diluted with water can be used to disinfect the roots, preventing any bacterial or fungal growth.
#### **2. Choose the Right Container**
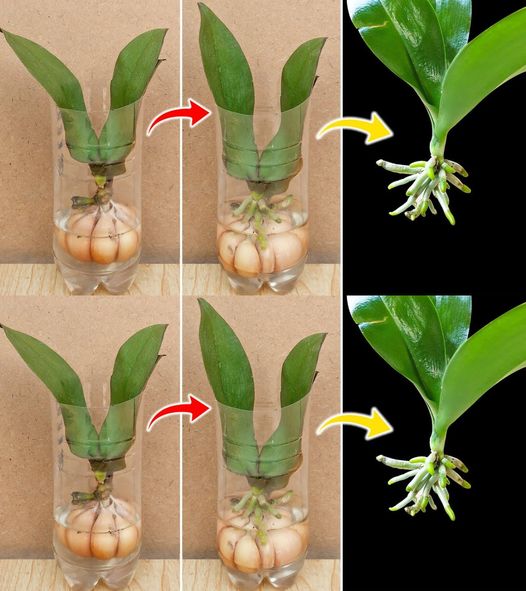
Select a clear, transparent container large enough to accommodate the orchid’s roots. The container should be deep enough for the roots to be submerged in water, but not completely drown the plant. The top of the orchid should be above the waterline, as the plant needs air to breathe.
A glass vase, jar, or even a decorative bowl can work well for this. The clear container also provides you with the benefit of being able to monitor the root system and water level easily.
#### **3. Add Rocks for Stability**
Place a layer of small rocks or pebbles at the bottom of your container. This will help to stabilize the orchid and prevent it from tipping over. The rocks should be placed in a way that allows the roots to rest gently against the side of the container while staying securely supported.
#### **4. Place the Orchid in the Container**
Carefully place the orchid into the container. Arrange the roots in a way that they can spread out without being overcrowded. Ensure the orchid’s roots are submerged in water, but the stem and leaves should remain above the waterline. If you find that the roots are too long, you can gently trim them to fit the container, but be cautious not to cut too much.
#### **5. Fill with Water**
Fill the container with filtered or distilled water until the roots are fully submerged. It’s important not to completely submerge the entire plant, as the stem and leaves should remain dry. Only the roots should be in contact with the water.
It’s also important to change the water regularly. Replace the water in your container every 7–10 days to keep it fresh and free from bacteria. This will ensure that your orchid’s roots stay healthy and the plant doesn’t develop any fungal or mold issues.
#### **6. Place Your Orchid in the Right Location**
Orchids thrive in bright, indirect sunlight. Place your water-grown orchid near a window with indirect light or in a location that receives soft sunlight throughout the day. Avoid direct sunlight, as this can burn the delicate leaves of the orchid.
Orchids are also sensitive to temperature changes, so keep the plant in an area with a steady temperature between 65°F and 75°F (18°C to 24°C). Avoid placing it near air conditioners, heaters, or fans.
#### **7. Monitor and Maintain the Plant**
Check on your orchid regularly. Ensure that the water level remains consistent and that the roots are submerged. If the water level drops, add more water to keep the roots hydrated. Keep an eye out for any signs of disease or pests.
Since orchids grown in water don’t need to be fertilized as often as those in soil, you can feed them with a diluted orchid fertilizer once a month. Use only a small amount, as too much fertilizer can damage the plant.
—
### **Common Problems and Solutions**
While growing orchids in water is simple and effective, you may encounter a few common issues. Here’s how to address them:
– **Yellow or soft roots**: This can be a sign of overwatering or poor water quality. Make sure to use distilled or filtered water and avoid completely submerging the plant in water.
– **Root rot**: If your orchid’s roots begin to rot, remove the affected roots, clean the remaining healthy roots with water, and ensure you’re changing the water regularly to prevent this issue.
– **Stagnant water**: Stagnant water can lead to bacterial or fungal growth. Always replace the water every week and use fresh, clean water.
—
### **Conclusion**
Growing orchids in water is a beautiful and low-maintenance way to enjoy these exquisite flowers in your home. With the right care and attention, your water-grown orchids can thrive and bloom, creating a stunning centerpiece that adds elegance to any space. By following the steps outlined above, you can successfully grow orchids in water and enjoy their beauty for months to come.
ADVERTISEMENT
