ADVERTISEMENT
—
### Instructions:
#### Step 1: Activate the Yeast
In a small bowl, combine the **warm water** and **sugar**. Stir gently until the sugar dissolves. Add the **active dry yeast** to the water and give it a quick stir. Let the mixture sit for about **5 minutes** until it becomes frothy and bubbly. This step ensures your yeast is active and will help your dough rise properly.
#### Step 2: Mix the Dough
In a large mixing bowl, combine the **flour** and **salt**. Once the yeast mixture is ready, pour it into the flour mixture along with the **olive oil** and **apple cider vinegar**. Stir the mixture with a wooden spoon or spatula until the dough starts to come together.
Add in the **sunflower seeds**, **sesame seeds**, and **flax seeds** (or any combination of seeds you prefer). Continue stirring until the dough is mixed and all ingredients are incorporated.
#### Step 3: Rest the Dough
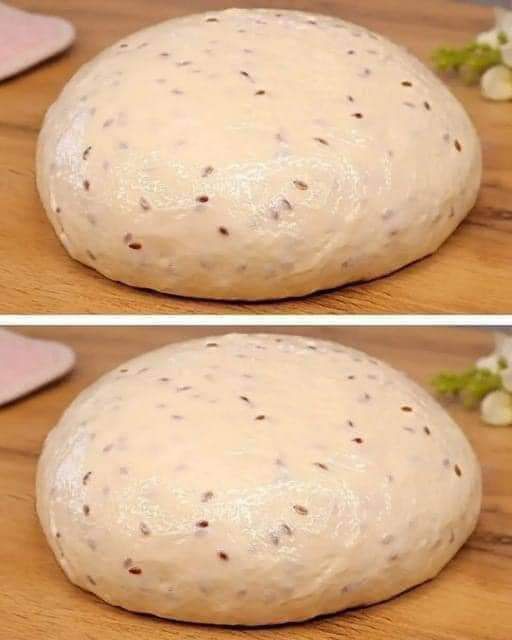
Cover the bowl with a clean kitchen towel or plastic wrap. Let the dough rest in a warm place for about **1 hour**. During this time, it will rise and become puffy. The dough should double in size, and you’ll notice air bubbles forming throughout.
#### Step 4: Shape the Dough
Once the dough has risen, gently punch it down to release the air. Turn the dough out onto a lightly floured surface and shape it into a round or oval loaf, depending on your preference. For a more rustic look, you can simply shape it with your hands, or for a more uniform shape, use a dough scraper.
#### Step 5: Second Rise
Place your shaped dough onto a baking sheet lined with parchment paper or into a round Dutch oven (if you have one). Lightly cover it with a kitchen towel and let it rise again for about **30-45 minutes**. During this second rise, the dough will puff up once more.
(Optional: If you want to add extra seeds on top for texture and decoration, now is the time to sprinkle them over the top of the loaf before baking.)
#### Step 6: Preheat the Oven
While your dough is rising, preheat your oven to **450°F (230°C)**. If you’re using a Dutch oven, place it with its lid in the oven while it’s heating up. This will help create a steaming environment for the bread, giving it that perfect crispy crust.
#### Step 7: Bake the Bread
Once your dough has completed its second rise, use a sharp knife or razor blade to make a few slashes on the top of the dough. This helps control how the bread expands as it bakes.
**If using a Dutch oven**: Place the dough into the preheated Dutch oven and cover with the lid. Bake for **25 minutes**, then remove the lid and bake for an additional **10-15 minutes** until the bread is golden brown and sounds hollow when tapped on the bottom.
**If using a baking sheet**: Simply place the loaf in the oven and bake for **30-35 minutes** or until the bread is golden and has a nice crispy crust.
#### Step 8: Cool and Enjoy
Once the bread is baked to perfection, remove it from the oven and let it cool on a wire rack for at least **15-20 minutes** before slicing. This step allows the bread to finish setting up and prevents it from becoming too doughy in the center when sliced.
—
### Why This Bread Recipe is a Winner
1. **Easy, No-Knead Process**: Unlike traditional bread recipes, there’s no need to spend time kneading the dough. The magic of artisan bread lies in the long fermentation process and the ability to let the dough rise at its own pace. The result is a loaf that’s full of flavor and texture.
2. **Seeded Perfection**: The combination of **sunflower seeds, sesame seeds**, and **flax seeds** creates a lovely contrast of crunch and flavor, making this bread a standout at any meal. The seeds also provide a boost of **healthy fats** and **fiber**, making your loaf both delicious and nutritious.
3. **Rustic and Beautiful**: This bread has a **beautiful, artisanal look** that’s perfect for impressing guests or enjoying as a comforting homemade loaf. It’s the kind of bread you would expect to find at a local bakery, but you made it yourself!
—
### Tips for the Best Seeded Artisan Bread
– **Play with Seed Combinations**: Don’t hesitate to mix things up! Try adding **pumpkin seeds, chia seeds**, or even **poppy seeds** for additional flavor and texture. Each type of seed brings its own unique quality to the bread.
– **Longer Resting Time**: If you have the time, consider allowing the dough to rise for a longer period (up to 12 hours in the refrigerator for the first rise). This will help develop a deeper flavor.
– **Dutch Oven for Extra Crispy Crust**: Using a **Dutch oven** creates a steaming environment, giving the bread a **crunchier crust**. If you don’t have a Dutch oven, a simple baking sheet will work just fine.
– **Serve Warm**: Artisan bread is best served fresh and warm. Enjoy it on its own, as a side, or use it for sandwiches, toast, or dipping in olive oil.
—
### Final Thoughts
This **Seeded Artisan Bread Dough Recipe** brings the magic of homemade bread right to your kitchen with minimal effort. It’s the perfect bread for any occasion—whether you’re enjoying a quiet breakfast with butter and jam, serving it as a side with dinner, or simply dipping it into some olive oil and balsamic vinegar as a snack.
The best part is that it’s **easy to make**, requires only a few simple ingredients, and can be customized to your liking. So, next time you’re craving the comforting smell and taste of freshly baked bread, try this recipe. I promise, you’ll be **obsessed** with how simple and delicious it is!
ADVERTISEMENT
