ADVERTISEMENT
—
### **Instructions**:
#### 1. **Activate the Yeast**:
In a small bowl, combine the **warm water** with the **sugar**. Stir until the sugar is dissolved, then sprinkle the **active dry yeast** over the top. Let it sit for about **5-10 minutes**, or until the mixture becomes foamy. This indicates that the yeast is active and ready to help the bread rise.
#### 2. **Combine Dry Ingredients**:
In a large mixing bowl, whisk together the **rice flour**, **salt**, and **xanthan gum** (if using). The rice flour will provide the base for the bread, while the xanthan gum helps to improve the texture, especially since rice flour doesn’t have the same elasticity as wheat flour.
#### 3. **Mix the Wet Ingredients**:
In a separate bowl, whisk together the **eggs**, **olive oil**, and **apple cider vinegar**. These ingredients will add moisture and flavor to the bread, as well as contribute to its rise.
#### 4. **Combine Wet and Dry Ingredients**:
Once the yeast mixture is foamy, pour it into the bowl with the wet ingredients, then add the wet mixture to the dry ingredients. Stir well until everything is fully combined and a dough-like consistency forms. The dough will be slightly sticky, but it should hold together. If the dough seems too wet, you can add a little extra rice flour, but it’s important to keep the dough on the softer side to ensure a light, airy texture.
#### 5. **Knead the Dough**:
Transfer the dough to a lightly floured surface and knead it gently for about **5 minutes**. Since rice flour dough can be stickier than regular bread dough, you can wet your hands slightly or sprinkle a little rice flour to make it easier to handle. Kneading the dough will help incorporate air, which is key for the bread’s rise.
#### 6. **Let the Dough Rise**:
Place the dough into a greased loaf pan (8×4 inches) and cover it with a clean kitchen towel or plastic wrap. Let it rise in a warm place for about **1 to 1.5 hours**, or until it has roughly doubled in size. The dough will not rise as much as wheat flour-based dough, but it should still expand slightly.
#### 7. **Bake the Bread**:
Once the dough has risen, preheat your oven to **375°F (190°C)**. Bake the bread for about **30-40 minutes**, or until the top is golden brown, and a toothpick inserted into the center of the loaf comes out clean. If the bread starts to brown too quickly, you can tent it with aluminum foil to prevent over-browning.
#### 8. **Cool and Slice**:
Remove the bread from the oven and let it cool in the pan for about **10 minutes** before transferring it to a wire rack to cool completely. Allow the bread to cool for at least **30 minutes** before slicing. This helps the texture set and makes it easier to cut without crumbling.
—
### **Serving Suggestions**:
Rice Yeast Bread can be enjoyed in a variety of ways. Here are some ideas for serving it:
– **For Breakfast**: Toast a slice and spread it with butter, honey, or your favorite jam for a quick and satisfying breakfast.
– **As a Sandwich**: Use the bread as the base for sandwiches. Its soft, yet sturdy texture holds up well to a variety of fillings, from roasted vegetables to grilled meats or cheese.
– **With Soups or Stews**: Serve slices of this bread with hearty soups, stews, or chili. The bread’s slightly nutty flavor pairs perfectly with savory dishes.
– **For Snacking**: Enjoy it as a snack with a drizzle of olive oil, some balsamic vinegar, or a sprinkle of your favorite herbs.
—
### **Tips for the Best Rice Yeast Bread**:
– **Rice Flour Quality**: Use high-quality rice flour to ensure the best texture and flavor. You can find rice flour in most grocery stores, but be sure to check that it’s labeled as gluten-free if necessary.
– **Knead Gently**: Rice flour dough doesn’t have the same elasticity as wheat dough, so avoid over-kneading it. A gentle kneading will help the dough retain its lightness.
– **Make Sure the Yeast is Active**: If your yeast doesn’t foam after being activated, it may be expired. Make sure to use fresh yeast to ensure the bread rises properly.
– **Allow for Cooling**: As tempting as it may be, let the bread cool completely before slicing to achieve the perfect texture and prevent it from falling apart.
—
### **Why This Recipe Works**:
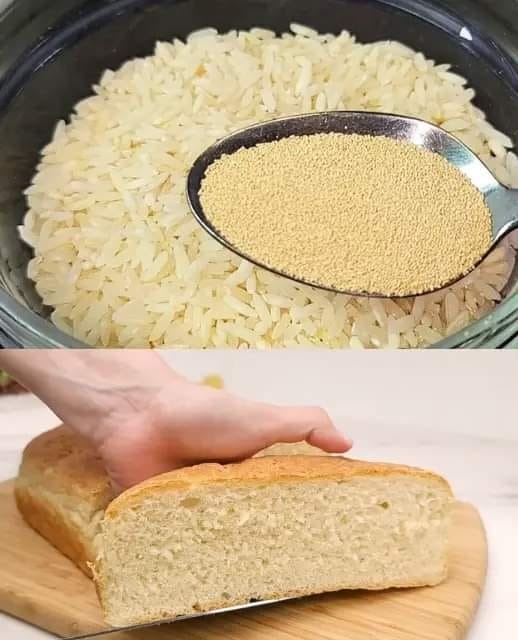
Rice Yeast Bread offers a delightful twist on traditional bread, using rice flour to create a naturally gluten-free loaf. The combination of yeast, olive oil, and eggs ensures that the bread has a light, airy texture, while the apple cider vinegar helps with the rise and gives the bread a slightly tangy flavor. The addition of xanthan gum (optional but recommended) adds elasticity to the dough, improving the texture and making it less crumbly. The result is a delicious and hearty bread that’s perfect for a variety of uses.
—
### **Conclusion**:
**Rice Yeast Bread** is a delicious, healthy, and versatile bread that provides a wonderful alternative to traditional wheat-based loaves. Whether you’re following a gluten-free diet or simply looking to try something new, this bread is an excellent choice. With its nutty flavor, tender texture, and nutritious ingredients, it’s sure to become a staple in your baking routine. So, grab your ingredients and try this wholesome and satisfying recipe today—you’ll love the fresh, homemade taste of Rice Yeast Bread!
ADVERTISEMENT
