ADVERTISEMENT
### **Instructions**:
#### 1. **Whip the Heavy Cream**:
Start by pouring the **heavy cream** into the bowl of your stand mixer (or a large mixing bowl if using a hand mixer). Turn the mixer on low speed to avoid splattering, and gradually increase the speed to medium-high.
Continue mixing the cream for about **3-4 minutes**. You will notice the cream turning into whipped cream at first, and then the texture will begin to change. Eventually, the whipped cream will start to separate into two parts: the **butterfat** (yellow, solid) and **buttermilk** (the liquid portion).
#### 2. **Separate the Buttermilk**:
Once the butter has fully separated from the buttermilk (this usually takes about **4-5 minutes**), stop the mixer. You should now have a nice lump of **butter** sitting in the bowl, with the **buttermilk** separating out.
**Optional**: Save the buttermilk for other recipes, like pancakes or cornbread—it’s rich and flavorful!
#### 3. **Drain the Buttermilk**:
To separate the buttermilk from the butter, carefully pour off the liquid. You can use a cheesecloth or a clean kitchen towel to help strain the buttermilk out, or simply use a spoon to scoop it out.
#### 4. **Rinse the Butter**:
To make sure all the buttermilk is removed (which helps extend the shelf life of your butter), rinse the butter under **cold water**. Gently knead it with a spatula or your hands (wearing gloves if you prefer), and continue rinsing until the water runs clear. This step ensures your butter will stay fresh longer and won’t spoil quickly.
#### 5. **Salt Your Butter (Optional)**:
If you want **salted butter**, simply mix in **1/4 teaspoon of salt** (or more, depending on your taste) and knead it into the butter. You can also add other seasonings or flavors at this point, such as minced garlic, herbs, or honey, for a personalized twist!
#### 6. **Store Your Homemade Butter**:
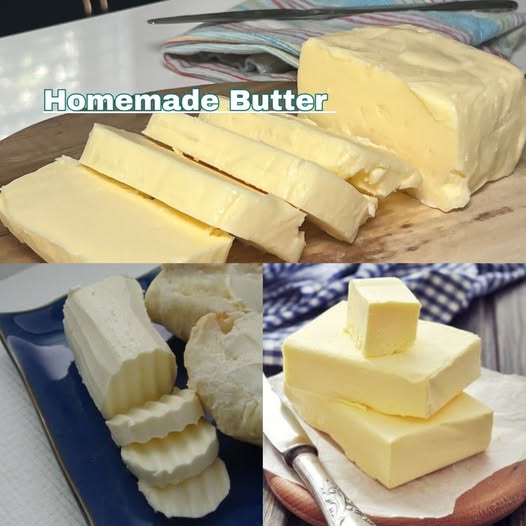
Transfer the finished butter into a clean container or mold. If you’ve made flavored butter, feel free to shape it with a spoon or press it into a mold for a beautiful presentation. Store the butter in the refrigerator, where it should stay fresh for up to **1-2 weeks**.
—
### **Why Homemade Butter is So Special**:
– **Fresh Taste**: Homemade butter tastes incredibly fresh and rich, far superior to store-bought butter. You’ll notice the difference in every bite.
– **Control Over Ingredients**: You have total control over the quality of ingredients. Opt for **organic heavy cream** or **grass-fed butter** for the best flavor and nutrients.
– **Customization**: Add different flavors to your butter, such as herbs, garlic, or spices, to make it uniquely yours. This makes it perfect for spreading on bread, using in cooking, or as a gift for family and friends.
– **Healthier Option**: When you make butter yourself, you know exactly what’s going into it—no additives or preservatives. It’s a more wholesome, natural option for those who prefer to eat cleaner.
—
### **Flavor Variations**:
While **unsalted butter** is the most common type, you can easily create flavored butter for a fun twist. Here are a few ideas:
1. **Garlic Herb Butter**: Add a few minced cloves of garlic and fresh herbs like rosemary, thyme, or parsley.
2. **Honey Butter**: Mix in 1-2 tablespoons of honey for a sweet, spreadable treat perfect for toast, muffins, or pancakes.
3. **Cinnamon Sugar Butter**: Add a dash of cinnamon and a tablespoon of sugar for a deliciously sweet spread that pairs well with baked goods.
4. **Spicy Chipotle Butter**: Add some chipotle powder or smoked paprika for a smoky, spicy kick.
—
### **Tips for Success**:
– **Use Fresh Heavy Cream**: Fresh cream will make the butter-making process smoother and yield a better result.
– **Room Temperature Ingredients**: If you’re using chilled heavy cream, it may take longer to whip. Let the cream sit out for a few minutes for the best results.
– **Don’t Overmix**: Once the cream separates into butter and buttermilk, stop mixing to avoid over-churning, which can turn your butter into a grainy texture.
– **Save the Buttermilk**: Don’t throw out the buttermilk! It can be used in baking, smoothies, or as a marinade for meats. It’s nutritious and adds a tangy flavor to recipes.
—
### **Conclusion**:
Making **homemade butter** is incredibly easy, fun, and satisfying. In just **five minutes**, you can have fresh, creamy butter that beats store-bought varieties any day. Plus, you get to control exactly what goes into your butter, allowing you to create something truly special. Whether you’re enjoying it on toast, using it in cooking, or gifting it to loved ones, homemade butter adds a deliciously personal touch to any meal. So why not give it a try today and enjoy the creamy goodness of fresh, homemade butter straight from your kitchen?
ADVERTISEMENT
