ADVERTISEMENT
—
### **Instructions:**
#### 1. **Prepare the Pan**
Start by greasing a large non-stick skillet or frying pan with the 1 tablespoon of butter. Ensure the pan is large enough to accommodate the bread as it expands while cooking.
#### 2. **Mix the Dry Ingredients**
In a large bowl, combine the flour, baking powder, salt, and sugar (if using). Stir them together with a whisk or spoon to ensure that the dry ingredients are evenly distributed.
#### 3. **Add the Wet Ingredients**
To the dry ingredients, add the milk, vegetable oil (or melted butter), egg, and vanilla extract (if using). Stir until the mixture is smooth and well combined. The batter should be thick but pourable.
#### 4. **Cook the Bread**
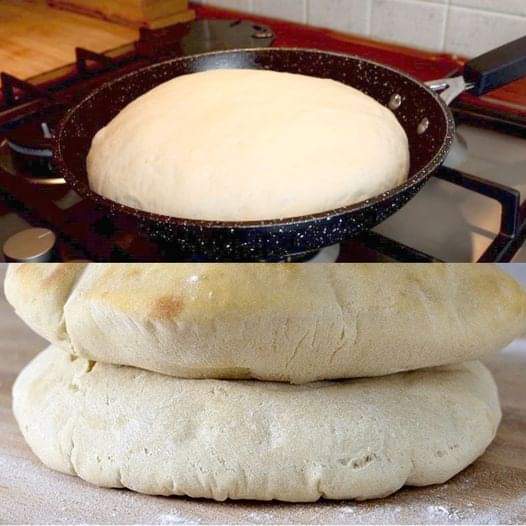
Pour the batter into the prepared skillet and spread it out evenly. Cover the skillet with a tight-fitting lid. Turn the heat to low or medium-low, depending on your stove. You want to cook the bread slowly to prevent it from burning while ensuring it cooks through.
Let the bread cook for about 25-30 minutes. Do not lift the lid during this time as the bread needs to steam and rise. After 25 minutes, check if the bread is cooked by inserting a toothpick into the center. If it comes out clean, it’s ready!
#### 5. **Golden Finish**
Once the bread is fully cooked, remove it from the skillet. Allow it to cool for a few minutes on a cooling rack before slicing. If you’d like a golden crust, you can briefly place the bread in a hot pan (without the lid) for 1-2 minutes to crisp up the edges.
#### 6. **Serve and Enjoy!**
Slice the bread into pieces and serve warm with butter, jam, or your favorite spread. It’s also perfect for making sandwiches or pairing with a hearty soup.
—
### **Additional Tips:**
– **Flavor Variations**: Add herbs like rosemary, thyme, or garlic powder to the dough for a savory twist, or mix in a handful of shredded cheese for a cheesy bread.
– **Sweet Touch**: Stir in cinnamon and raisins for a sweet version of the bread, perfect for breakfast.
– **Storing Leftovers**: Keep any leftover bread in an airtight container for up to 3 days, or freeze slices for longer storage.
—
### **Final Thoughts**
This no-oven bread recipe is an absolute game-changer, offering a simple and quick way to make fresh bread without the hassle of using an oven. With minimal ingredients and an easy stovetop cooking method, you can enjoy homemade bread whenever you want. Whether you’re new to bread-making or a seasoned pro, this recipe is perfect for satisfying that bread craving without any fuss. Try it today and discover how easy it is to make delicious, homemade bread right on your stovetop!
ADVERTISEMENT
