ADVERTISEMENT
**Easy and Delicious No-Oven Bread Recipe: A Quick Way to Make Homemade Bread**
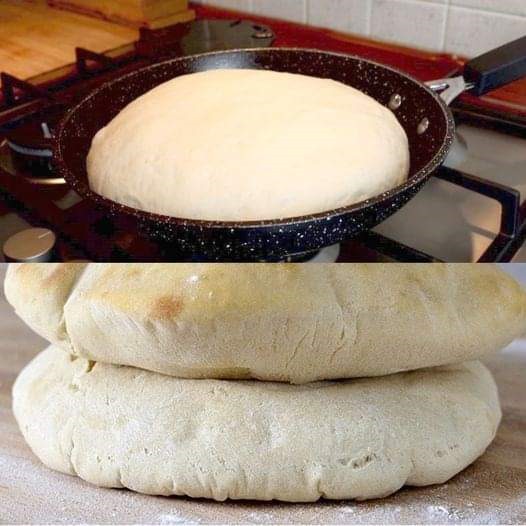
Homemade bread is one of life’s simplest joys. The warm, comforting aroma of fresh-baked bread filling the kitchen is enough to make anyone smile. But what if you don’t have an oven or simply want to avoid turning it on during hot summer months? No problem! With this **Easy and Delicious No-Oven Bread Recipe**, you can enjoy freshly baked bread without the need for an oven. This quick and straightforward recipe delivers a soft, fluffy loaf that’s perfect for any meal, whether you’re making sandwiches, serving it with soups, or enjoying it with butter.
### Why You’ll Love This No-Oven Bread Recipe:
1. **No Oven Needed**
If you’re short on kitchen space or simply don’t want to heat up the house by using an oven, this recipe is the perfect solution. You can easily make this bread on the stovetop using a skillet or pan.
2. **Quick and Simple**
This no-oven bread recipe is easy enough for beginners. There’s no need for kneading or complex steps—just mix, shape, and cook. Plus, it takes less time than traditional bread-making methods, so you can enjoy warm, homemade bread in no time.
3. **Soft and Fluffy Texture**
Despite the no-oven method, this bread still comes out soft, fluffy, and tender. The combination of ingredients ensures that it’s light and airy, giving you the perfect texture to enjoy with any meal.
4. **Customizable**
You can easily customize this recipe by adding herbs, spices, or even grated cheese to give the bread your own twist. The base recipe is neutral, so feel free to get creative with mix-ins.
### Ingredients:
– 2 cups all-purpose flour (or whole wheat flour for a healthier option)
– 2 teaspoons baking powder
– 1/2 teaspoon salt
– 1 tablespoon sugar (optional, for a slightly sweet bread)
– 1/2 cup milk (or plant-based milk for a dairy-free version)
– 1/4 cup olive oil (or melted butter)
– 1 large egg
– 1 teaspoon vanilla extract (optional for a sweeter flavor)
– Extra flour for dusting
### Directions:
#### 1. **Mix the Dry Ingredients:**
– In a large mixing bowl, combine the **flour**, **baking powder**, **salt**, and **sugar** (if using). Stir the dry ingredients together until they’re evenly mixed.
#### 2. **Add the Wet Ingredients:**
– In a separate bowl, whisk together the **milk**, **olive oil**, **egg**, and **vanilla extract** (if using). Mix until the wet ingredients are well combined.
#### 3. **Combine Wet and Dry Ingredients:**
– Pour the wet ingredients into the bowl with the dry ingredients. Stir everything together with a spoon or spatula until it forms a dough. The dough should be soft and slightly sticky, but not too wet. If it feels too sticky, add a little more flour until it’s manageable.
#### 4. **Shape the Dough:**
– Turn the dough out onto a lightly floured surface. Gently knead the dough for just a minute or two until it comes together into a smooth ball. Be careful not to overwork the dough, as this can result in a denser texture.
– Once kneaded, shape the dough into a round or oval shape, depending on your preference.
#### 5. **Cook the Bread:**
– Heat a non-stick skillet or frying pan over **medium heat**. Lightly grease the pan with a small amount of oil or butter, just enough to prevent sticking.
– Carefully place the shaped dough into the hot skillet. Cover the pan with a lid to help the bread cook evenly. Cook the bread for about **8-10 minutes** on the first side, until it’s golden brown and sounds hollow when tapped on the bottom.
– Flip the bread over and cook for another **5-8 minutes** on the other side, until it’s golden brown and cooked through.
#### 6. **Let It Cool:**
– Once the bread is cooked, remove it from the skillet and let it cool on a wire rack or a clean kitchen towel for a few minutes before slicing.
#### 7. **Serve and Enjoy:**
– Slice the bread while it’s still warm and serve it with your favorite toppings, whether it’s butter, jam, or used to make a sandwich. This bread is perfect for breakfast, lunch, or dinner.
Tips for Success:
For Complete Cooking STEPS Please Head On Over To Next Page Or Open button (>) and don’t forget to SHARE with your Facebook friends
ADVERTISEMENT
