ADVERTISEMENT
### How to Clean a Dirty Iron Using the Laundromat Method: Bring It Back to Life Like New
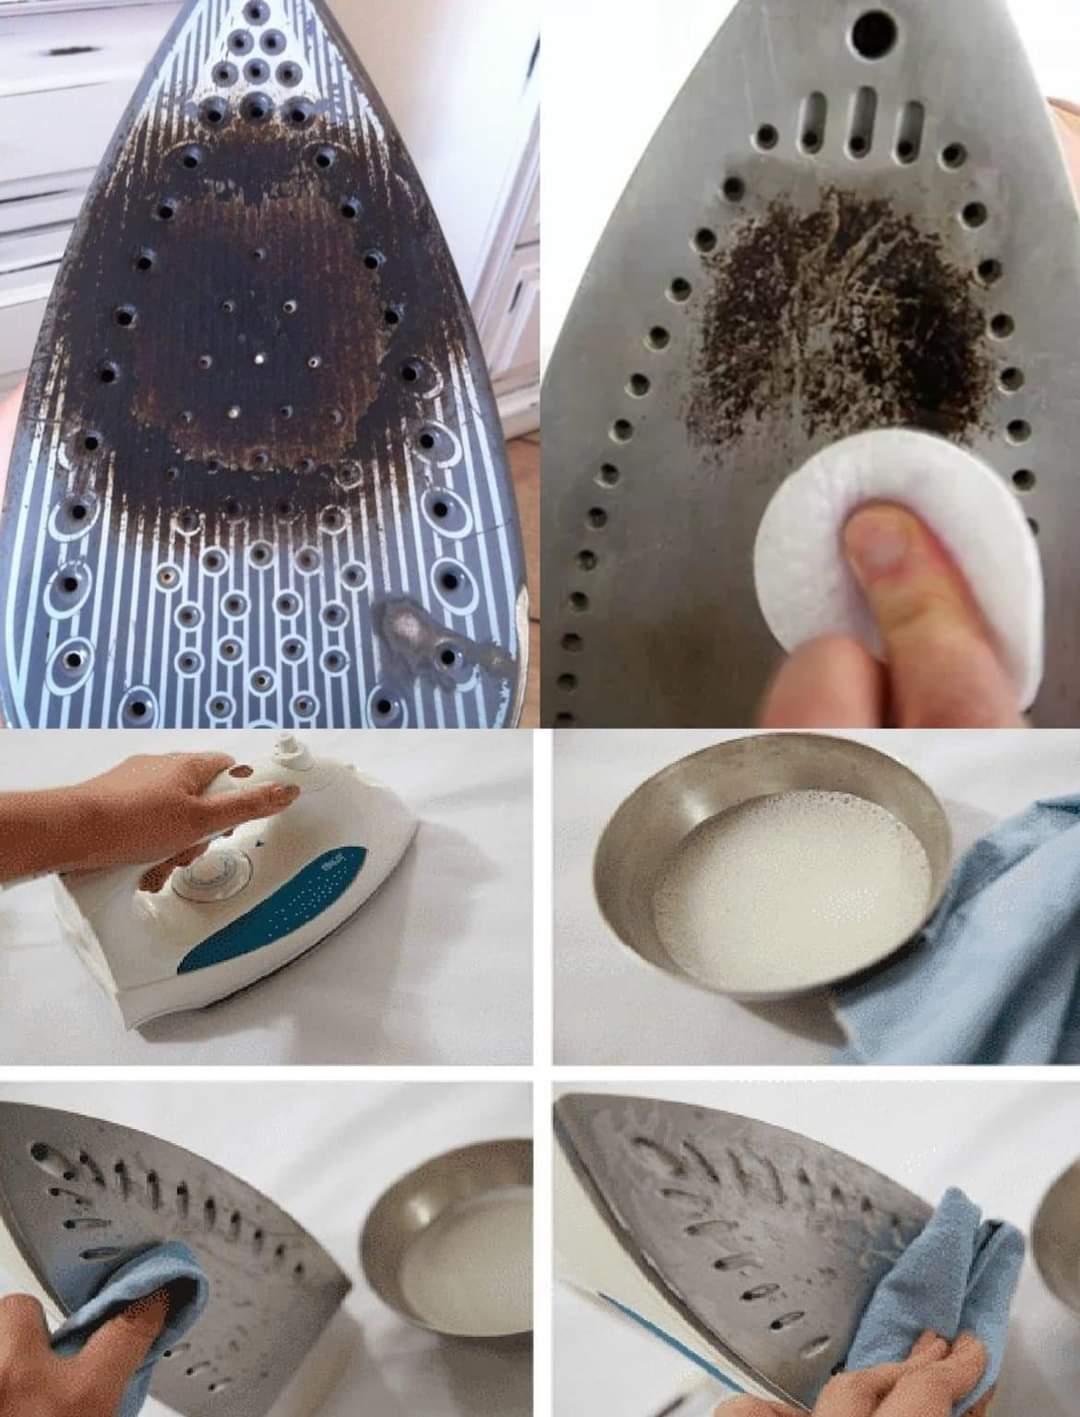
An iron is an essential household tool, whether you’re pressing clothes, linens, or even steam cleaning certain fabrics. However, over time, it’s common for irons to accumulate grime, residue, and even burn marks from excessive heat or mineral deposits in the water. A dirty iron not only affects its performance, but it can also leave stains or scorch marks on your clothes, making it frustrating to use.
If you’re dealing with a grimy iron, there’s an easy and effective way to restore it to like-new condition using a method inspired by the laundromat. This **Laundromat Method** cleans the iron from top to bottom, ensuring it works properly and extends its lifespan. And the best part? It doesn’t require expensive cleaning products or complicated techniques.
Let’s take a closer look at how you can get your dirty iron sparkling clean using this simple yet effective method.
### Why Clean Your Iron?
Before we dive into the cleaning process, it’s important to understand why a clean iron is essential:
1. **Prevents Staining**: Build-up on your iron’s plate can transfer to fabrics, leaving unsightly stains or scorched patches on your clothes.
2. **Improves Performance**: A clean iron glides smoothly over fabric and produces steam evenly, which means your ironing process will be faster and more efficient.
3. **Extends the Lifespan**: Regular maintenance can prevent your iron from getting clogged or damaged, extending its lifespan and making it last longer.
4. **Safety**: Cleaning the iron helps prevent the build-up of minerals or chemicals that can cause the iron to overheat or malfunction.
### The Laundromat Method for Cleaning Your Iron
The Laundromat Method is a step-by-step process inspired by professional cleaning techniques used in laundromats and dry-cleaning establishments. This method is easy, uses common household ingredients, and can work on almost any type of iron, including steam irons, dry irons, and even vintage models.
#### What You’ll Need:
– **Baking soda** (a natural cleaner and mild abrasive)
– **White vinegar** (great for removing stains and mineral deposits)
– **Cotton cloth or paper towels**
– **A non-abrasive sponge or soft brush**
– **Water** (preferably distilled, if available)
– **A bowl or small dish**
#### Step-by-Step Guide to Cleaning Your Iron:
##### Step 1: Unplug and Prepare the Iron
Safety first! Before you start cleaning, make sure the iron is unplugged and has cooled down completely. This will prevent any accidents and burns while you work.
##### Step 2: Clean the Soleplate (The Bottom)
The soleplate (or the bottom part of the iron) is where most of the gunk and grime builds up. Over time, mineral deposits, starch, and fabric fibers can stick to the plate, causing it to get sticky or dirty.
1. **Create a Baking Soda Paste**: Mix **2 tablespoons of baking soda** with a small amount of water to form a thick paste.
2. **Apply the Paste**: Use a cotton cloth or sponge to apply the baking soda paste directly to the soleplate of the iron. Gently scrub the surface, focusing on areas with heavy build-up.
3. **Wipe Off**: Once you’ve scrubbed away the grime, use a clean, damp cloth to wipe off the paste and any loosened residue.
For stubborn spots or scorched areas, try using a **non-abrasive sponge** or a soft brush to scrub the surface gently. Never use steel wool or harsh scrubbers, as they can scratch and damage the soleplate.
##### Step 3: Clean the Steam Holes
If your iron has steam holes, these can quickly get clogged with mineral deposits, especially if you’ve used tap water. Fortunately, the laundromat method offers a simple fix.
1. **White Vinegar and Water Solution**: Mix **equal parts white vinegar and water** in a bowl. This solution helps dissolve mineral deposits and keep the steam holes clear.
2. **Soak a Cloth**: Dip a cotton cloth or paper towel into the vinegar-water mixture, wring it out, and place it over the steam holes.
3. **Let It Sit**: Let the cloth sit on the iron for **10-15 minutes** to allow the vinegar to break down any mineral build-up.
4. **Wipe Clean**: After the vinegar has had time to work, use a clean, damp cloth to wipe away any remaining residue.
For Complete Cooking STEPS Please Head On Over To Next Page Or Open button (>) and don’t forget to SHARE with your Facebook friends
ADVERTISEMENT
