ADVERTISEMENT
How to Make Homemade Bread
#### Step 1: Activate the Yeast
Start by activating the yeast to ensure that your bread rises perfectly. In a small bowl, combine **1 cup of warm water** with **1 tablespoon of sugar**. Sprinkle the **yeast** over the water and stir gently. Let the mixture sit for about **5-10 minutes**, or until it becomes frothy and bubbly. This shows that the yeast is alive and ready to help your dough rise.
#### Step 2: Mix the Dough
In a large mixing bowl, combine the **flour** and **salt**. Make a well in the center and pour in the activated yeast mixture, along with **1 tablespoon of olive oil** or melted butter. Stir the mixture with a spoon or your hands until the dough starts to come together.
Once the dough has formed, transfer it to a lightly floured surface and knead for about **8-10 minutes**. You’ll want to knead until the dough becomes smooth and elastic. If the dough is too sticky, sprinkle in a bit more flour. If it’s too dry, add a small amount of water, a tablespoon at a time, until the dough is soft and tacky but not sticky.
#### Step 3: First Rise
Once the dough is kneaded, form it into a ball and place it in a lightly greased bowl. Cover the bowl with a clean kitchen towel or plastic wrap, and let it rise in a warm, draft-free place for about **1 to 1.5 hours**, or until the dough has doubled in size.
#### Step 4: Shape the Dough
After the dough has risen, punch it down gently to release any air bubbles. Then, transfer the dough to a lightly floured surface and shape it into a loaf by rolling it out into a rectangle and folding the edges in towards the center, or simply form it into a round loaf.
Place the shaped dough into a greased loaf pan or on a baking sheet if you’re making a round boule. Cover it again with the towel or plastic wrap and let it rise for another **30 minutes**.
#### Step 5: Preheat the Oven
While the dough is undergoing its second rise, preheat your oven to **375°F (190°C)**.
#### Step 6: Bake the Bread
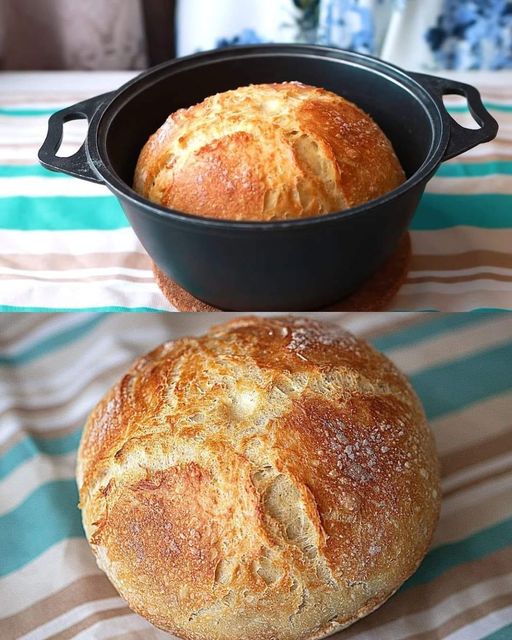
Once the dough has risen for the second time, place the loaf in the preheated oven. Bake for **25-30 minutes**, or until the bread is golden brown on top and sounds hollow when tapped on the bottom. If you want a crispier crust, you can brush the top of the loaf with a bit of water or olive oil before baking.
#### Step 7: Cool the Bread
Once the bread is baked, remove it from the oven and allow it to cool on a wire rack for at least **15 minutes** before slicing. This cooling period allows the structure of the bread to set, making it easier to slice and ensuring that the texture is just right.
### Tips for Perfect Homemade Bread
1. **Use Warm Water, Not Hot**: When activating the yeast, make sure the water is warm (about 110°F or 43°C). Water that’s too hot can kill the yeast, while cold water won’t activate it properly.
2. **Don’t Skip the Kneading**: Kneading the dough is an essential step in developing the gluten structure, which gives the bread its chewy texture. Be sure to knead until the dough is smooth and elastic.
3. **Don’t Overwork the Dough**: If you knead the dough too much, the bread can become dense. Stop kneading once the dough is smooth and stretchy.
4. **Customize the Flavor**: Experiment with adding different ingredients to the dough, like **herbs**, **garlic**, **cheese**, or even a handful of **seeds** (such as sunflower or sesame). These will add flavor and texture to your loaf.
5. **Let It Rise in a Warm Place**: To speed up the rising process, place your dough in a warm environment, such as near a sunny window or on top of a warm oven. The warmth encourages the yeast to work faster.
6. **Check for Doneness**: If you’re unsure whether the bread is done, tap the bottom of the loaf. If it sounds hollow, it’s ready. If it sounds dense, it may need more time in the oven.
### Why You’ll Love Homemade Bread
Making **homemade bread** is an incredibly rewarding experience. The satisfaction of slicing into a warm, fresh loaf that you created with your own hands is unmatched. This recipe gives you the perfect balance of soft, fluffy interior and a slightly crisp exterior—ideal for sandwiches, toast, or enjoying with a little butter.
What’s even better is that **homemade bread** can be made with minimal ingredients, and it’s entirely customizable to suit your tastes. Whether you prefer a classic white loaf, a hearty whole wheat version, or a loaf flavored with garlic and rosemary, the choice is yours.
### Final Thoughts
**Homemade bread** is a simple yet impressive dish that can elevate any meal. Once you get the hang of it, you’ll find that making your own bread is a fun and fulfilling process. Plus, there’s nothing like the taste of fresh, warm bread right out of the oven.
So, gather your ingredients, roll up your sleeves, and enjoy the process of creating something truly special. With this easy homemade bread recipe, you’ll be baking like a pro in no time!
ADVERTISEMENT
