ADVERTISEMENT
### Ingredients for Easy-to-Make Bread Without Kneading
– **3 cups all-purpose flour** (you can substitute whole wheat flour for part of the white flour for a heartier bread)
– **1 teaspoon salt**
– **1/2 teaspoon instant yeast** (also known as rapid-rise yeast)
– **1 1/2 cups warm water** (about 110°F or 45°C)
– **1 tablespoon olive oil** (optional, for added flavor and richness)
– **1 tablespoon sugar or honey** (optional, to help activate the yeast and slightly sweeten the bread)
### Instructions for Easy-to-Make Bread Without Kneading
Making this easy no-knead bread is simple and doesn’t require any special skills. Here’s how you can prepare it:
#### Step 1: Mix the Dry Ingredients
In a large bowl, combine the flour, salt, and instant yeast. Stir to mix everything together evenly.
#### Step 2: Add the Wet Ingredients
Make a small well in the center of the dry ingredients and add the warm water, olive oil (if using), and sugar or honey (if desired). Stir everything together using a wooden spoon or your hands until a shaggy dough forms. The dough will be sticky, which is exactly what you want.
#### Step 3: Let the Dough Rise
Cover the bowl with a clean kitchen towel or plastic wrap, and let the dough rise at room temperature for about 12-18 hours. The longer the dough rises, the more flavor it will develop. You can let it rise overnight and bake it the next day.
Don’t worry if the dough looks a little messy or uneven. After the rise, it will become a cohesive, bubbly dough ready for baking.
#### Step 4: Shape the Dough
Once the dough has risen, gently punch it down to release any excess air bubbles. You don’t need to knead it—just fold the edges inward toward the center. Transfer the dough to a floured surface and shape it into a rough ball or oval.
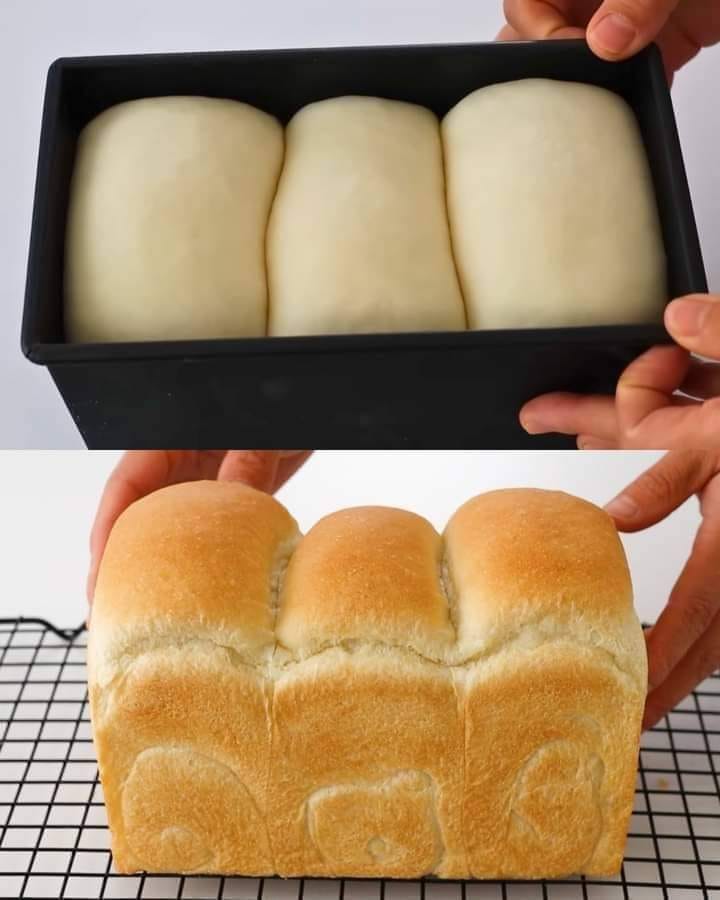
If you prefer a more rustic look, you can simply leave the dough as-is and place it directly onto a baking sheet. Alternatively, you can place it in a greased loaf pan for a more traditional loaf shape.
#### Step 5: Preheat the Oven and Prepare the Baking Dish
While the dough is resting for its final rise, preheat your oven to 450°F (230°C). Place a Dutch oven or a heavy, oven-safe pot with a lid in the oven while it heats up. This will help create a hot, steamy environment that mimics a professional bread oven, helping the bread rise and develop a beautiful crust.
#### Step 6: Bake the Bread
Once the oven is preheated, carefully remove the Dutch oven (or baking dish) from the oven. Gently place the dough into the hot pot, and cover it with the lid.
Bake for 30 minutes, then remove the lid and bake for an additional 10-15 minutes to allow the top to brown and crisp up. The bread should be golden brown, and you can tap the bottom of the loaf to make sure it sounds hollow—a sign that it’s fully baked.
#### Step 7: Cool and Serve
Once the bread is baked, remove it from the oven and let it cool on a wire rack for at least 30 minutes before slicing. This allows the bread to set and makes slicing easier. Serve it warm with butter, jam, or your favorite spread, and enjoy!
### Tips for Perfect No-Knead Bread
– **Use the Right Type of Yeast**: Make sure you’re using instant or rapid-rise yeast for this recipe. These types of yeast don’t require activation, which makes the process much faster and easier.
– **Water Temperature Matters**: The water should be warm, not hot. Too hot of water can kill the yeast, while too cool of water won’t activate it properly. Aim for a temperature around 110°F (45°C)—it should feel warm but not scalding when touched.
– **Flavor Additions**: Once you’ve mastered the basic no-knead bread, you can start experimenting with flavorings. Add herbs like rosemary, thyme, or garlic to the dough, or fold in shredded cheese or olives for a Mediterranean twist.
– **Let It Rise Longer for More Flavor**: While the bread can be ready in as little as 12 hours, allowing the dough to rise for 18 hours (or even longer, up to 24 hours) will give the bread a richer flavor and texture.
– **Don’t Skip the Resting Time**: The dough needs to rest and rise to develop its characteristic texture. Be sure to give it enough time to fully rise before shaping and baking.
– **Perfect for Meal Prep**: If you’re making this bread for a special dinner, you can prepare the dough the night before and bake it the following day. It’s an excellent option when you need fresh bread but want to save time on the day of your meal.
### Why This No-Knead Bread is Perfect for Any Baker
This **Easy-to-Make Bread Without Kneading** is perfect for anyone who enjoys fresh homemade bread but doesn’t want to spend hours kneading and waiting for dough to rise. It’s great for beginner bakers, busy parents, or anyone looking to simplify the bread-making process without sacrificing flavor.
This bread pairs beautifully with soups, stews, salads, and any meal that calls for a hearty side of bread. It’s also versatile enough to enjoy on its own with a little butter, or toasted for sandwiches or bruschetta.
### Final Thoughts
Making homemade bread doesn’t need to be a complicated, time-consuming process. With this **Easy-to-Make Bread Without Kneading** recipe, you can enjoy fresh, delicious bread with minimal effort. The crispy crust and tender, airy crumb will make you forget all about store-bought loaves. Plus, you can feel good about creating a homemade loaf with just a few simple ingredients. Whether you’re an experienced baker or just starting, this bread recipe is a game-changer and will quickly become a go-to in your kitchen. Happy baking!
ADVERTISEMENT
