ADVERTISEMENT
### Instructions for Making Rainbow Oreo Cheesecake Drip Cake
#### 1. **Prepare the Cake Layers**
Start by preheating your oven to **350°F (175°C)**. Grease and line 6-inch round cake pans with parchment paper (you can also use 8-inch pans if you prefer a larger cake).
In a medium bowl, whisk together the **flour**, **baking powder**, and **salt**. Set aside.
In a large bowl, beat the **butter** and **sugar** together until light and fluffy, about 4-5 minutes. Add the **eggs**, one at a time, beating well after each addition. Mix in the **vanilla extract**.
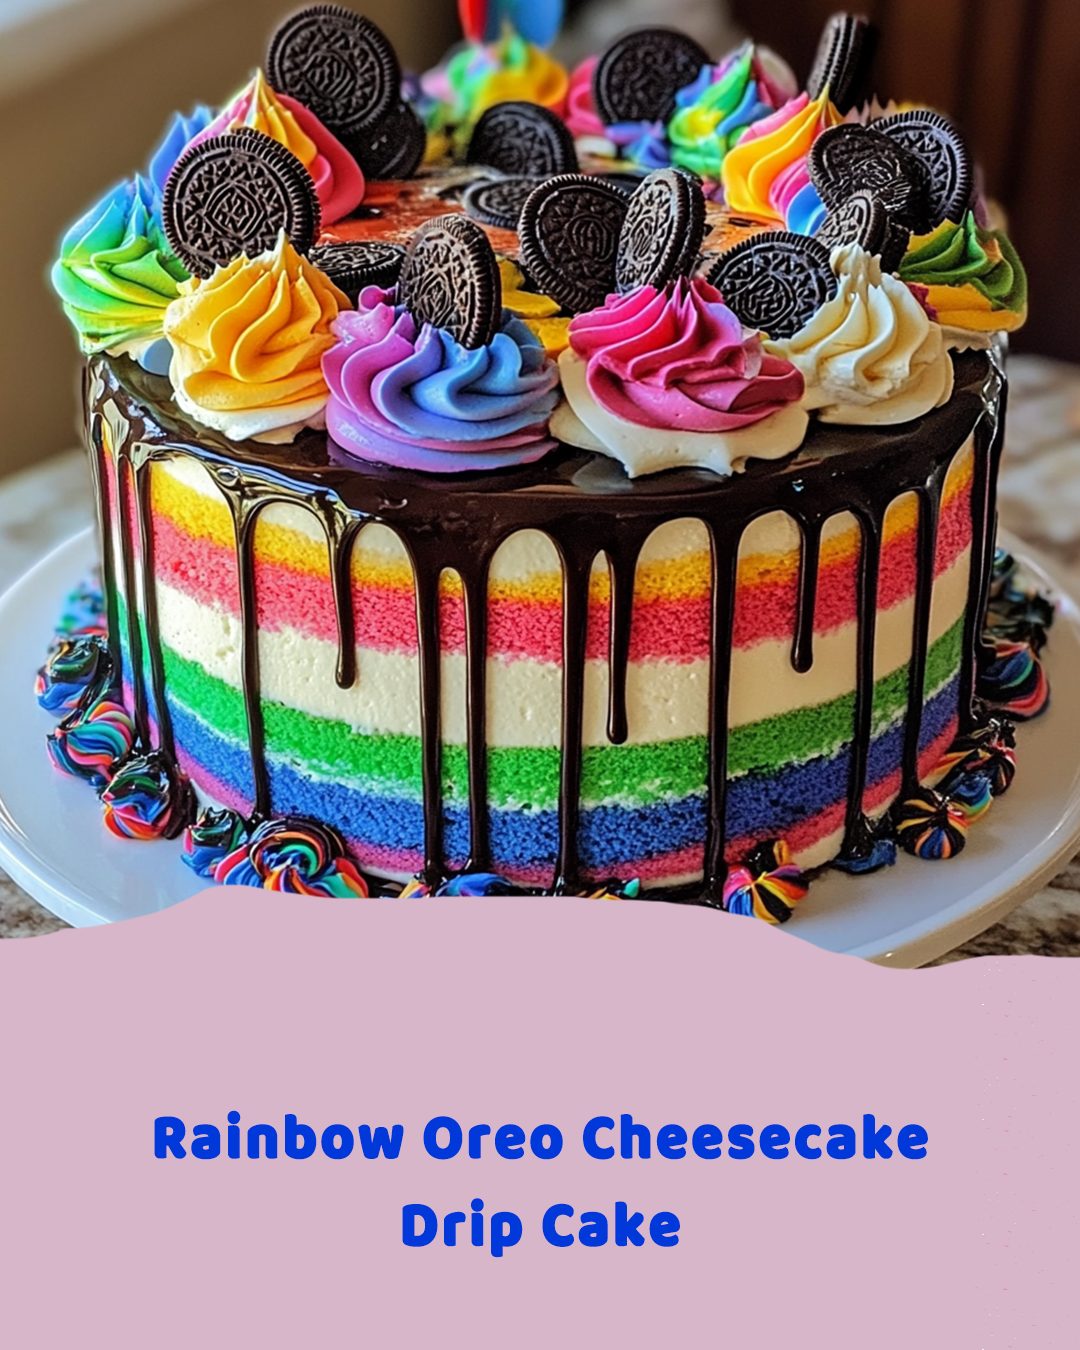
Gradually add the dry ingredients to the wet ingredients, alternating with the **milk**, and mix until smooth and fully incorporated. Divide the batter evenly into six small bowls. Add a different color of gel food coloring to each bowl (one for each rainbow color) and mix until the batter is evenly colored.
Pour each colored batter into its own prepared cake pan, smoothing the tops with a spatula. Bake for **25-30 minutes**, or until a toothpick inserted into the center comes out clean. Let the cakes cool in their pans for about 10 minutes before transferring them to wire racks to cool completely.
#### 2. **Make the Oreo Cheesecake Filling**
While the cakes are cooling, make the Oreo cheesecake filling. In a large bowl, beat the **cream cheese** and **powdered sugar** together until smooth and creamy.
In a separate bowl, whip the **heavy cream** until stiff peaks form, about 3-5 minutes with an electric mixer. Gently fold the whipped cream into the cream cheese mixture until fully combined.
Finally, fold in the crushed **Oreo cookies**. Set the filling aside in the fridge while you prepare the chocolate drip.
#### 3. **Make the Chocolate Drip**
In a heatproof bowl, heat the **heavy cream** in the microwave until it’s warm, but not boiling—about 30 seconds to 1 minute. Add the **chocolate chips** and stir until smooth and glossy. If you prefer a shinier drip, add a tablespoon of **butter** to the mixture. Let the chocolate drip mixture cool slightly before using it.
#### 4. **Assemble the Cake**
Once the cakes are completely cool, level each cake layer with a serrated knife if needed. Place the first layer of cake on a cake stand or serving platter.
Spread a layer of **Oreo cheesecake filling** over the cake, smoothing it out to the edges. Add the second layer of cake and repeat with the filling. Continue layering the cake and cheesecake filling until all layers are stacked, ending with a layer of cake on top. Chill the cake in the fridge for 30 minutes to firm up the layers.
#### 5. **Apply the Drip**
Once the cake is chilled, pour the slightly cooled **chocolate drip** mixture into a squeeze bottle or spoon it over the top edge of the cake. Gently let the drip fall down the sides of the cake. You can control the drip by applying more or less pressure when using the squeeze bottle.
After the drip is applied, spread a thin layer of the cheesecake filling over the top of the cake to create a smooth surface.
#### 6. **Decorate the Cake**
Now for the fun part—decorating! Top the cake with **mini Oreo cookies** and any other decorations you desire, such as **sprinkles**, **rainbow-colored candy**, or **edible glitter** for a dazzling touch. You can also drizzle some of the leftover chocolate ganache on top for extra flavor.
#### 7. **Serve and Enjoy**
Once your cake is fully decorated, slice and serve this beautiful **Rainbow Oreo Cheesecake Drip Cake** at your next special event. It’s sure to be a hit with both kids and adults alike!
### Tips for a Perfect Rainbow Oreo Cheesecake Drip Cake
– **Coloring the Cake**: Use gel food coloring to get bright, vivid rainbow layers. Liquid food coloring can affect the texture of the cake, so gel coloring is a better choice for achieving vibrant colors without altering the batter.
– **Chill Between Steps**: After assembling the layers and applying the cheesecake filling, chill the cake in the fridge to make it easier to apply the drip and decorate.
– **Make it Ahead**: You can prepare the cake layers and Oreo cheesecake filling a day in advance to save time. Just assemble and decorate the cake on the day you plan to serve it.
– **Drip Consistency**: If the chocolate drip is too runny, let it cool for a few minutes before applying it to the cake. If it’s too thick, add a little more cream to thin it out.
### Final Thoughts
The **Rainbow Oreo Cheesecake Drip Cake** is a show-stopping dessert that’s sure to wow your guests with its vibrant colors, decadent flavors, and smooth chocolate drip. With its creamy Oreo cheesecake filling and moist rainbow cake layers, this cake is a perfect choice for any celebration, big or small. Whether you’re celebrating a birthday, a special event, or just want to treat yourself, this cake is as delicious as it is beautiful.
So, gather your ingredients, unleash your creativity, and make this unforgettable cake today!
ADVERTISEMENT
