ADVERTISEMENT
### Instructions:
#### 1. **Preheat the Oven**:
– Preheat your oven to 400°F (200°C). This high temperature will help your breadsticks become crispy and golden on the outside while staying soft and cheesy on the inside.
#### 2. **Prepare the Pizza Dough**:
– Roll out the pizza dough onto a lightly floured surface. If using store-bought dough, you can unroll it directly onto a baking sheet.
– Gently stretch and press the dough into a rectangular shape or a shape that fits your baking sheet. Aim for an even thickness, about ½ inch thick. This will ensure that the breadsticks cook evenly.
#### 3. **Season the Dough**:
– Brush the dough with olive oil (or melted butter) to give it a golden, crispy texture once baked. You can use a pastry brush or simply drizzle the oil over the dough and spread it with a spoon.
– Sprinkle garlic powder and dried Italian seasoning (if using) evenly over the dough for extra flavor. You can also add a pinch of salt and freshly cracked black pepper if desired.
#### 4. **Add the Cheese**:
– Evenly sprinkle the shredded mozzarella cheese over the dough, making sure to cover it from edge to edge. Then sprinkle the grated Parmesan cheese on top for a little extra sharpness and flavor. You can adjust the cheese quantities depending on how cheesy you want your breadsticks.
#### 5. **Cut the Dough into Breadsticks**:
– Using a sharp knife or a pizza cutter, carefully slice the dough into strips. Make the strips as wide or as narrow as you like, but aim for even sizes to ensure they cook uniformly. If you want your breadsticks to have a more rustic, “pull-apart” look, you can also cut them in a diagonal shape.
#### 6. **Bake the Breadsticks**:
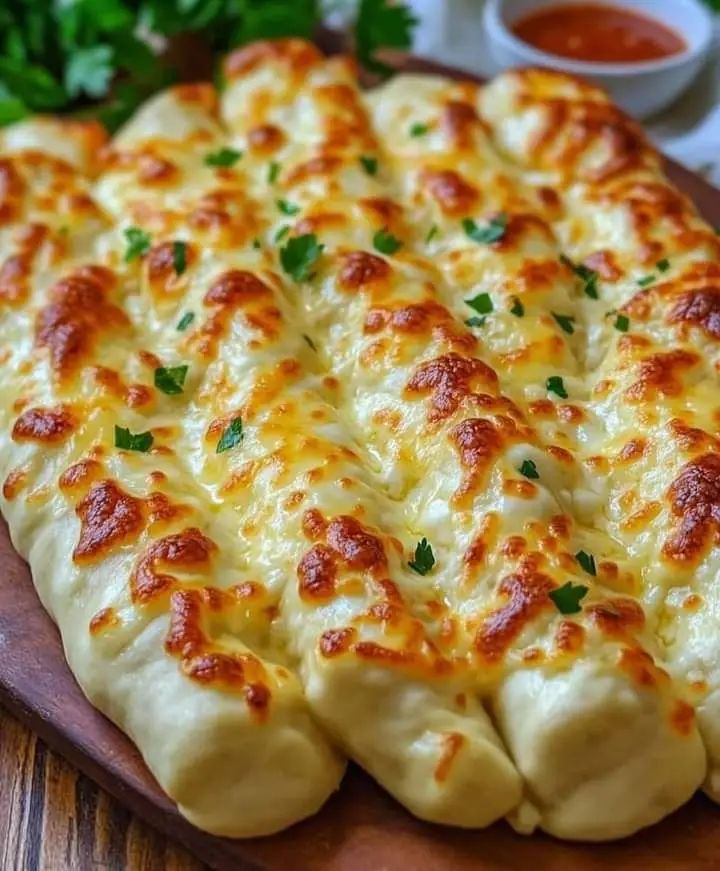
– Place the baking sheet in the preheated oven and bake the breadsticks for 12-15 minutes, or until the cheese is melted and bubbly, and the dough is golden brown and crispy on the edges. Keep an eye on them as baking times can vary depending on your oven and the thickness of the dough.
#### 7. **Serve**:
– Once the breadsticks are done baking, remove them from the oven and let them cool slightly before serving.
– You can brush the hot breadsticks with a little more olive oil or melted butter for extra flavor. If desired, garnish with fresh herbs like parsley or basil for a fresh touch.
– Serve with marinara sauce, ranch dressing, or any of your favorite dipping sauces on the side for extra indulgence.
### Tips for the Best Cheesy Breadsticks:
1. **Use Fresh Dough**: While store-bought dough is convenient, homemade pizza dough will give your breadsticks a fresh, puffy texture that takes them to the next level. If you have time, try making your own dough for a more artisanal touch.
2. **Cheese Variations**: While mozzarella is a classic choice, you can mix it up by adding other types of cheese like cheddar, provolone, or even gouda for a unique twist. The more cheese, the better!
3. **Make It Spicy**: If you like a little heat, sprinkle some crushed red pepper flakes on top of the cheese before baking. You can also serve the breadsticks with spicy marinara sauce or sriracha ranch for a zesty kick.
4. **Experiment with Toppings**: For added flavor, try topping your cheesy breadsticks with extra ingredients like sautéed onions, bell peppers, or even cooked bacon bits. You can customize these breadsticks to fit your taste preferences.
5. **Keep Them Warm**: If you’re serving the breadsticks at a party or gathering, keep them warm in a low oven (around 200°F) until it’s time to eat. This will ensure they stay deliciously cheesy and fresh.
6. **Cut Them Into Fun Shapes**: Instead of traditional breadsticks, you can cut the dough into fun shapes like twists, circles, or even mini pizza pockets. Just adjust the baking time accordingly.
### Why These Cheesy Breadsticks are So Special:
1. **Perfectly Crispy and Cheesy**: These breadsticks have the perfect balance of crispiness on the outside and gooey cheese on the inside. They’re everything you want in a cheesy snack or appetizer.
2. **Customizable**: You can get creative with the toppings, cheese blends, and seasonings. Whether you like them extra cheesy, garlicky, or spicy, this recipe is versatile enough to suit every taste.
3. **Quick and Easy**: With minimal prep time and just a short baking time, these cheesy breadsticks are incredibly easy to make, even on a busy weeknight. No need for complicated steps or ingredients—just simple, delicious comfort food.
4. **Ideal for Sharing**: These breadsticks are great for sharing with family, friends, or guests. Whether it’s a cozy night at home or a big family dinner, they’re sure to be a crowd-pleaser.
5. **Great for Pairing**: Cheesy breadsticks go well with so many dishes. Pair them with pizza, pasta, salads, or soup for a complete meal, or serve them on their own as a snack for watching movies or enjoying an afternoon treat.
### Conclusion:
**Cheesy Breadsticks** are the ultimate snack for cheese lovers and comfort food enthusiasts alike. With their gooey cheese filling, crispy golden crust, and endless customization options, they’re perfect for any occasion. Whether you’re looking for a side dish to complement a family dinner, a quick snack to curb your cravings, or a simple appetizer for your next party, these cheesy breadsticks are sure to satisfy.
Easy to make, delicious to eat, and guaranteed to be a hit with everyone, cheesy breadsticks will quickly become one of your go-to recipes for when you want something cheesy, savory, and satisfying. So go ahead—get baking and indulge in these cheesy delights!
ADVERTISEMENT
